
The Story Behind A Beautiful Beast
A Bit of Graphic Computing History, The Reasoning and a Guide to Choosing the Best Components and Design for A Computer That Meets My Creative Needs
THE 1990s: THE WORKSTATION OF A 3D CG ARTIST
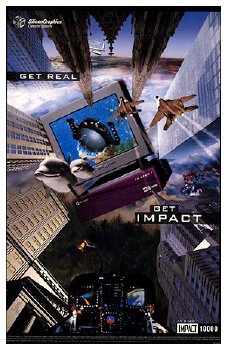
Remember the first Jurassic Park movie? Terminator 2: Judgement Day? Total Recall? Independence Day? Starship Troopers? The Abyss? All these Sci-fi classics have one thing in common: they all contain realistic, animated computer-generated characters and virtual sets, seamlessly integrated with live action. These minds blowing, game-changing visual effects were all created on Silicon Graphics workstations.
Silicon Graphics, Inc (SGI) was an American, high-performance computing manufacturer that produced computer hardware and software. That company was founded in 1981 and was headquartered in Mountain View, California, US. SGI’s collaboration with Hollywood changed the entire industry when the titans such as Steven Spielberg’s decided to create the CG dinosaurs in Jurassic Park. It cemented SGI status as the undisputed and unchallenged king of 3D computer graphics.
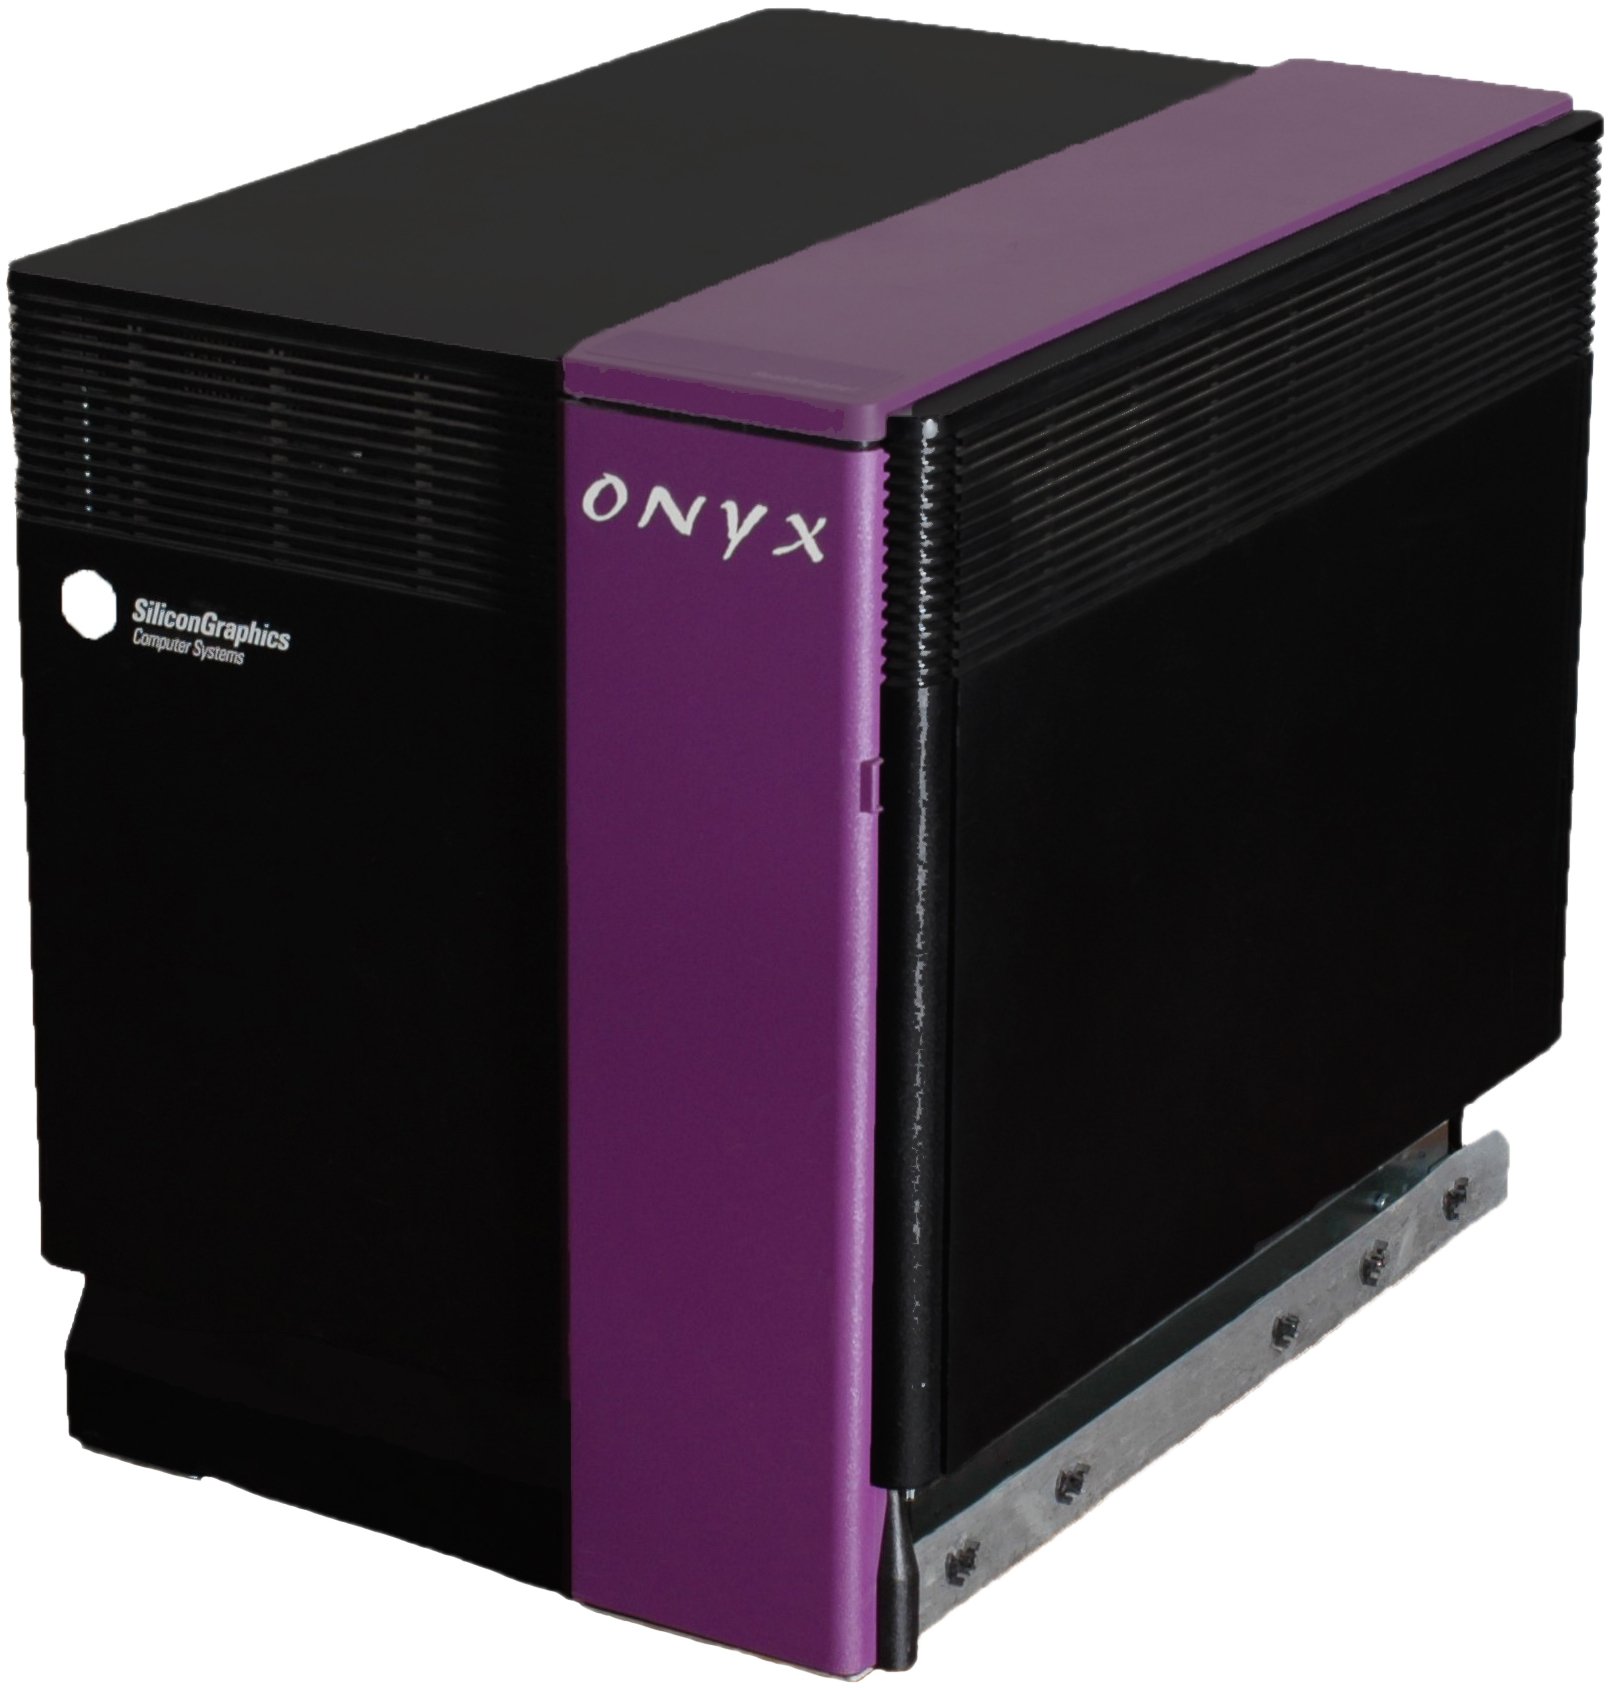
If you were into serious about 3D computer graphics in the 1990s and early 2000s, there was one name and one logo EVERYONE knew. Silicon Graphics.
Credit SGI Vintage Stuff and SGI Stuff

My work as a 3D CG artist and architectural visualization specialist from 1991 to 2008 required a computer that could handle complex and demanding tasks. Back then, there weren't many computer options to choose from. PCs and Macs were very basic in the 1990s, and they could barely manage to open and print a Word document. If you wanted to design a logo, a layout of a magazine, you were already pushing the limits of their capabilities.
But I wanted to create photorealistic visuals of interiors, buildings in their surroundings and visual effects for TV Commercials. There was no PC or Mac that could come even close to the challenge. What I needed was a graphics computer with high-end CPU, a very powerful graphics engine with tons of RAM, and tons of storage space. A computer the early 1990s with such specifications was a borderline sci-fi device. But luckily for a guy like me, it did exist.
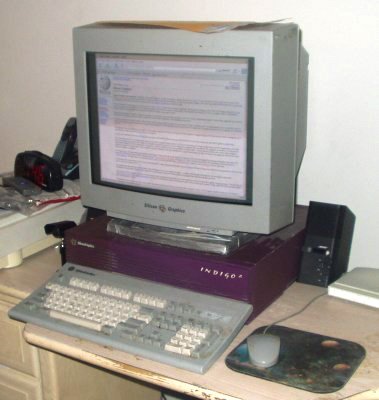
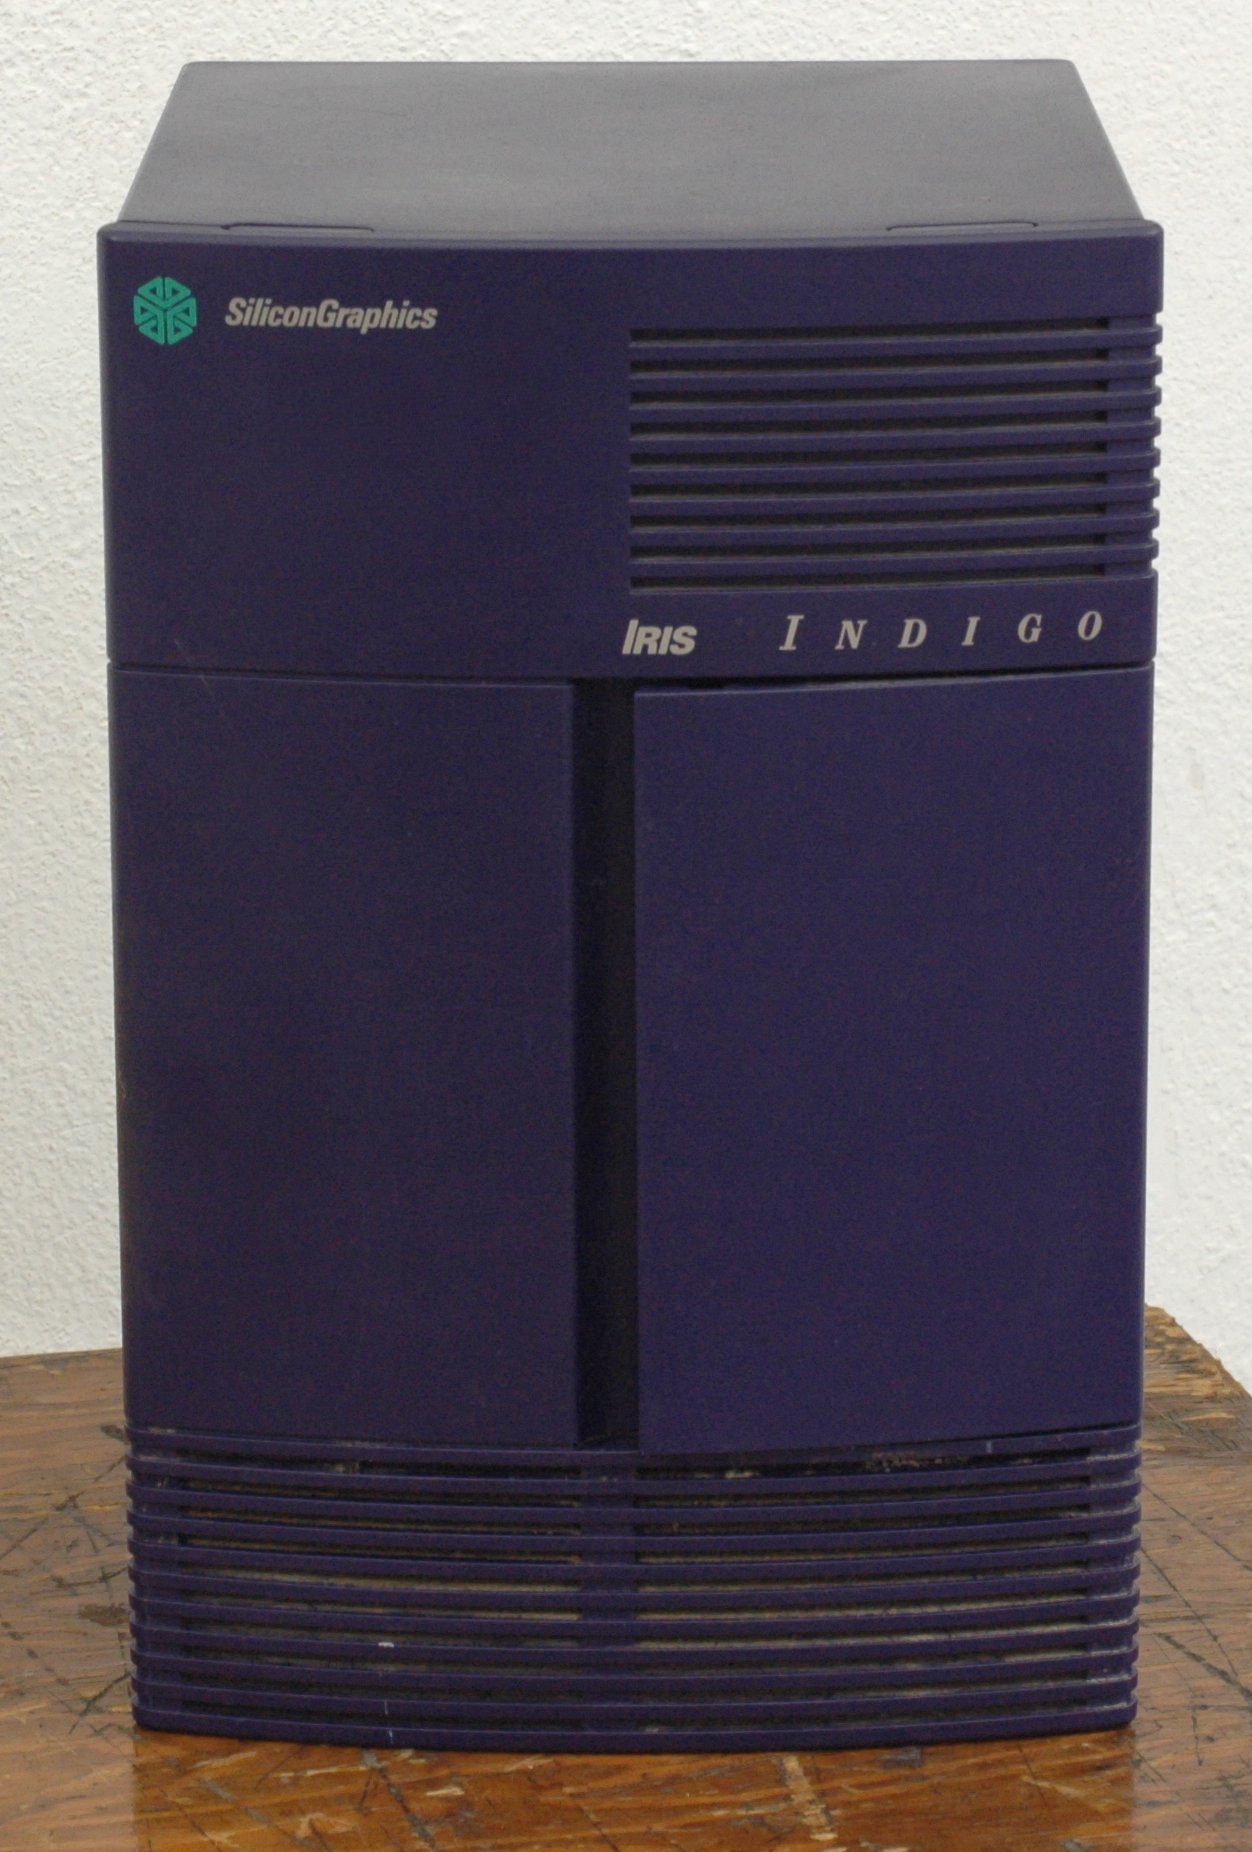
The company I worked for acquired Silicon Graphics Indigo 2 Extreme, and it was all I could hope for, and more. In 1992, this computer was the definition of state-of-the-art graphic computing. It was a “basic” model, costing a whopping $50,000, and the software license (Wavefront Explore with Arris Integra renderer) cost another $50,000. That was a lot of money to pay for a computer which was used by just one artist, an unimaginable figure by today’s standards!
Rendering computer generated images was always the definition of a CPU torture. Even today, rendering 3D graphics is considered as one of the most demanding computational tasks you can run on the computer. So imagine trying to render a 3D CG image on a computer in the early 1990s which was about a thousand times slower than today’s workstations! It was a true test of patience.
Despite its limitations, I did manage to create my very first 3D CG images with this wonder of a computer. The output resolution of the images I was producing at the time was only 1280 x 1024 pixels, barely enough for an A4 sized print. Yes, they looked great, they impressed absolutely everyone who saw them at the time. But it took the computer seven full days and nights to render one image! Oh, and the computer heated up the whole room while it was rendering images. It was an absolute fire breathing monster. Look, I’m a patient guy, but 7 days was crazy amount of waiting. Imagine trying to explain this to your client.
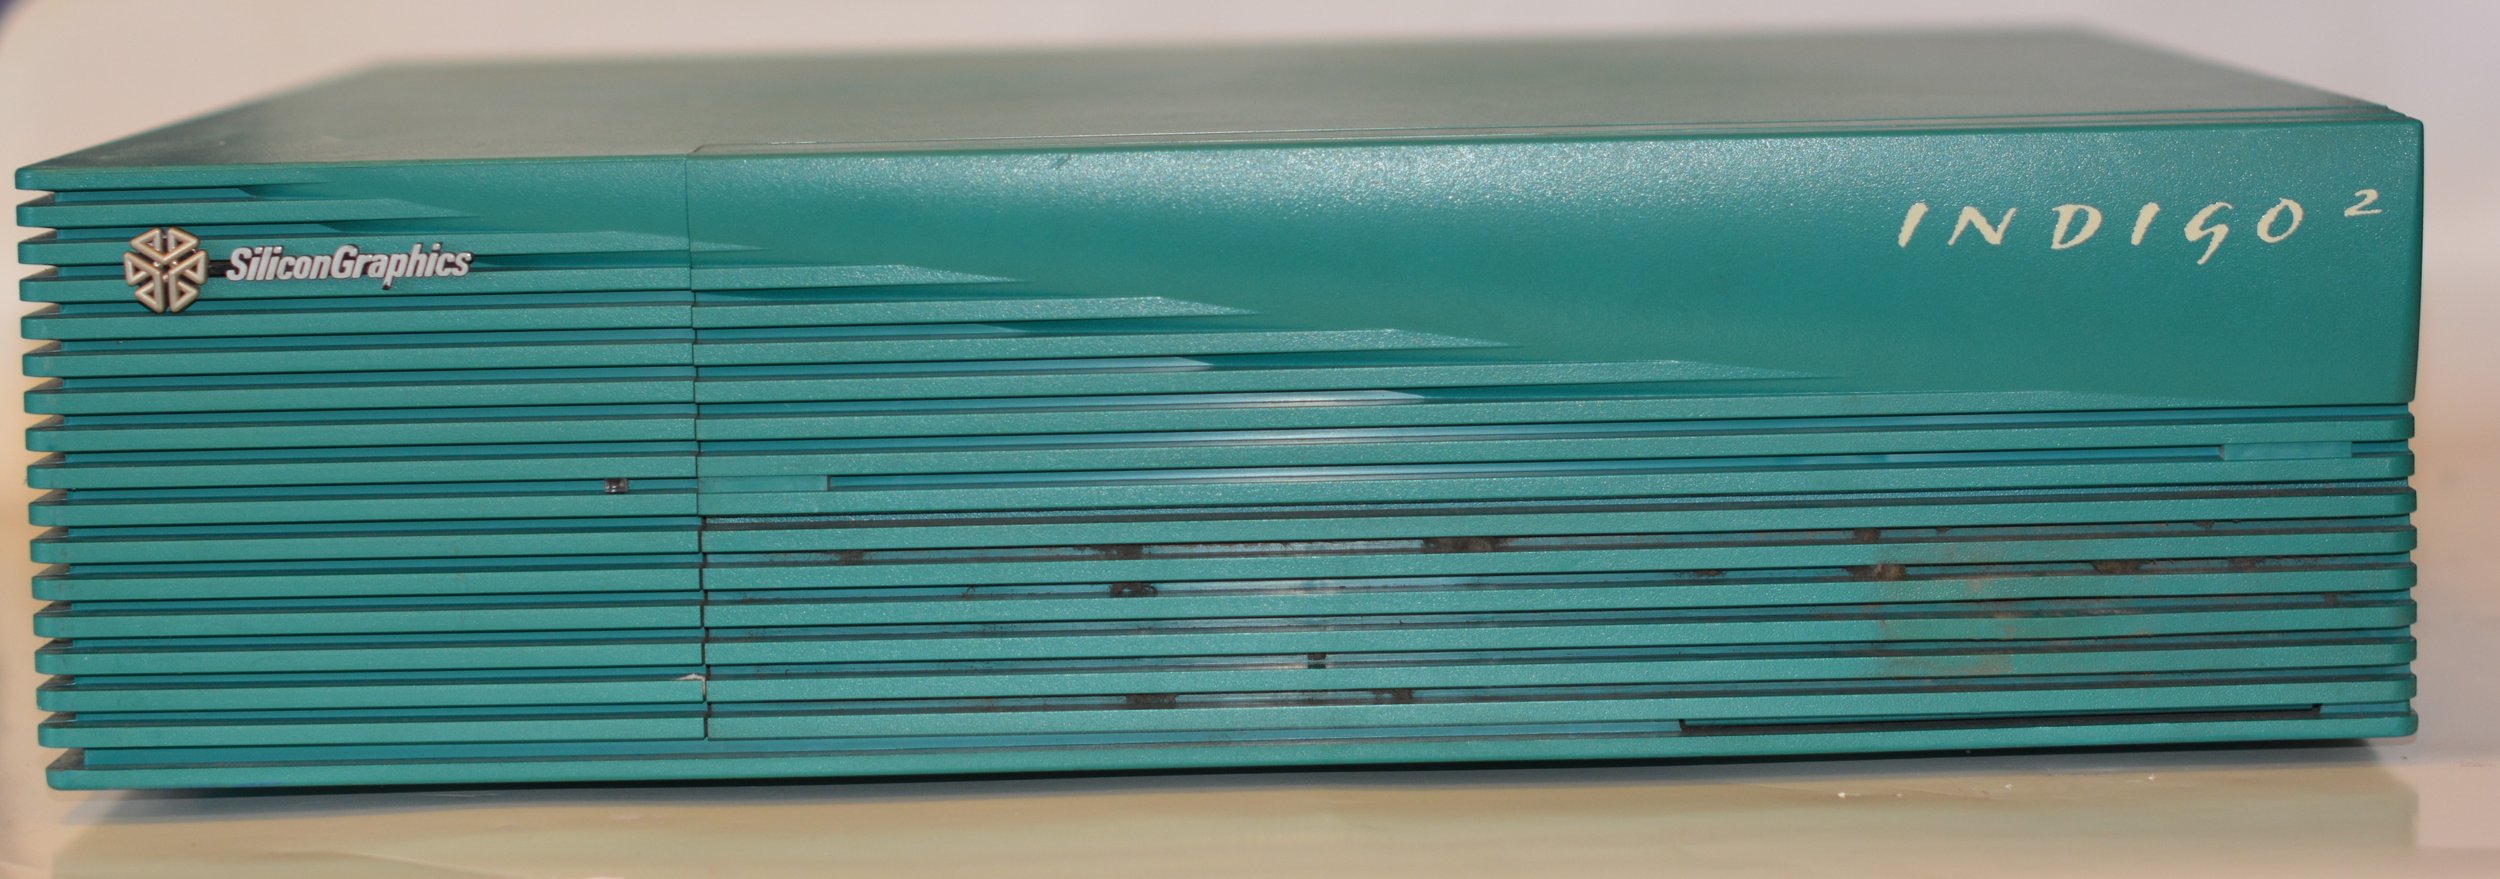
These are some of the earliest 3D renderings I created using Integra/Specter, a groundbreaking rendering software from Japan, on a Silicon Graphics Indigo 2 Extreme workstation. Between 1992 and 1994, I experimented with Integra/Specter’s features, such as physically accurate lighting simulation, bi-directional raytracing, radiosity, multiple light sources, and advanced material attributes. This software was capable of simulating different types of BRDF models for isotropic surfaces, smooth dielectric boundaries, and textured surfaces.
One of my renderings, a classic interior scene with a glass table, won the first prize in the Textronix International Design Visualization Competition 1994, out of 3000 entries from around the world. At that time, these 3D renderings were considered cutting-edge and futuristic, and they attracted a lot of attention from the architectural design community.


Over time, computers got faster and cheaper, but my 3D CG projects also became more complex. As a result, render times remained high until the early 2000s, when dual processor motherboards became available. They cut render times by half, but they were very costly, What we did instead was built “render farms”; a stack of networked computers stripped of any components except those needed to render images. It was a relatively affordable solution, but not very stable, and we spent more time debugging crashed render session than using them for real, actual rendering assignments.
Having enough RAM in your 3D CG workstation was essential. In the 1990s, computers without enough RAM would "overflow" with information and start swapping data to hard drive. Performance would drop dramatically, by as much as 99 percent! In 1995, 128 MB of RAM (yes, megabytes, not gigabytes…) was considered a lot and a kit would cost about $10,000. RAM was a precious commodity comparable to pure gold! At the time of writing, 192 GB of RAM costs around $700. We’ve come a long way since then.
Computers for 3D CG visualization always needed a lot of storage space for 3D CGI project files. But what really ate the storage capacity were the rendered images. An animation was normally a sequence of uncompressed 32-bit Targa (.TGA) images. Thousands and thousands of them. Those hard drives filled up in no time. Today, my archive holds more than 100 hard drives and well over 300 CDs and Blu-rays, each containing animation files for projects and clients around the world.

For more than three decades, I have been creating and archiving hundreds of thousands of projects for clients worldwide. These projects cover various fields and applications, such as architectural design, product visualization, animation, photography and more. I have stored them all in my huge library of CD-R and DVD-R discs, which are like a time capsule of my creative work. These discs also reflect the evolution of the software and hardware tools that I have used over the years, some of which are now obsolete or rare. I am proud of my collection; it is my digital legacy.
COMPUTING NEEDS OF A PHOTOGRAPHER AND TIME-LAPSE ARTIST
In 2008, I embarked on a journey as a photographer and time-lapse artist. I gathered a lot of different camera equipment, but my need for computers did not diminish. What changed were the internal specifications, compared to those of a computer meant for a 3D CG artist. Image and video editing software didn't take advantage of dual processor workstations when I started working with digital cameras. Computers configured with 3D CG applications in mind were wasted on Lightroom, Photoshop and Premiere. These applications mostly ran as a single-core process and didn’t benefit from symmetric multi-processing (SMP). The obvious choice therefore was a top-spec, single processor computer with the highest available clock speed.
Adobe products were benefiting from fast processors, but what really made them run much faster was the introduction of CUDA technology found specifically in Nvidia graphic cards and incorporated into Adobe Premiere CS4 release in 2008.
My main computer in 2009 meant for Photoshop and Lightroom was a fast laptop with an 18-inch display, Intel i5 processor with 4 CPU cores, 32GB RAM and Nvidia graphic card with CUDA. For my content at that time, this computer had more than sufficient hardware power. A few years later I bought another laptop with an Intel i7 CPU because my photography and time-lapse projects became more demanding.

All my work between 2008 and 2015 was done on this great HP laptop. It served me well, until my projects outgrew it.
But I kept getting new 3D CG visualization projects and these laptops could not handle the processing demands. I needed a lot more computing power, so I got a new workstation in 2015. It was a fully custom-built machine. Every component inside it was carefully considered for speed, stability and functionality. I ended up getting a full-height ATX tower (humongous black box) with a dual CPU server motherboard from Asus. It was fit with two Intel Xeon E5-2690 v3 processors, 128 GB of registered ECC RAM, two Nvidia GTX Titan X cards, and a Samsung 850 PRO SSD system drive. The main storage array was an external, 8-bay SSD RAID enclosure with 8 Samsung SSD 850 Pro 1TB drives, configured in RAID-6 for 5.47 TB of storage space. The array communicated with the computer via Areca RAID PCI card with twin SAS cables, giving me a total of 12 Gb/s of throughput. For 2015, this was very fast!
It was an impressive workstation that could handle 3D CGI creation, photo editing, and time-lapse edits with ease. My DSLR cameras output 20 to 50-megapixel images, and my time-lapses were rendered at Full HD resolution, seldom in 4k. As my time-lapse projects grew in complexity driven by the demands of my clients, and the volume of work increased, my hunger for processing power grew. In 2017, I got a very fast laptop that was fully custom-built according to my specifications. This computer was considerably faster than my workstation in practically every 2D and video editing task, despite costing 4 times less. It was a massive, 18.4” “laptop” with a full-sized Nvidia GTX 980 card, an overclocked Intel i7-6700K processor running at 4GHz with 4 cores and 64GB RAM, and two internal SSD drives. The biggest addition was the Thunderbolt-3 port which allowed me to connect to fast external hard drives via USB-C port that I could use not just to archive but do online editing of my projects. It changed the way I was working.
From 2015 to 2023, these were my computers for day-to-day work. I had a dual Intel Xeon PC and a mobile workstation, both custom built to suit my needs. Fast SSD RAID array kept my files safe and always accessible. These computers served me well and I created some amazing work on them, until they became outdated by the huge files produced by modern cameras and the ultra high-resolution video formats.


Then I started working with medium format digital cameras; Fujifilm GFX50 and GFX100, which were released in 2017 and 2019, respectively. These cameras output spectacular, ultra high-resolution images. There’s a downside of course – massive RAW files. They increased computing demands on my computer quite dramatically, not to mention the pressure on my disk storage capacity. It is incomparably more difficult to edit 100-megapixel photos and 12k films than it is to edit 30-megapixel photos and 2k videos. I very quickly discovered the limitations of my antiquated machines. They were choking which made editing slow and difficult. Editing time-lapse videos was particularly painful and I was continually running out of disk storage space. In 2023, after four years of putting up with it, I made the decision to upgrade to a new system.
Many projects, tight production deadlines, multiple camera bodies, huge amount of data. Your computer better be ready to digest all those files.


RESEARCH & CONSIDERATIONS
I started making plans for my next computer in the spring of this year. I was aware that it wouldn't be an off-the-shelf item, but I had no clue how lengthy and enjoyable the construction process would be! To choose the right components for my next computer, I started researching my typical projects and identifying the bottlenecks. I wanted to upgrade the computer in all areas where fluidity of work was needed, especially editing ultra-high resolution panoramic images, editing batches of hundreds of 100-megapixel images, creating 3D CG content occasionally, cutting videos to recorded voice-overs, mixing sound effects, and adding music scores to my time-lapse films, which often exceed 8K resolution.
CPU
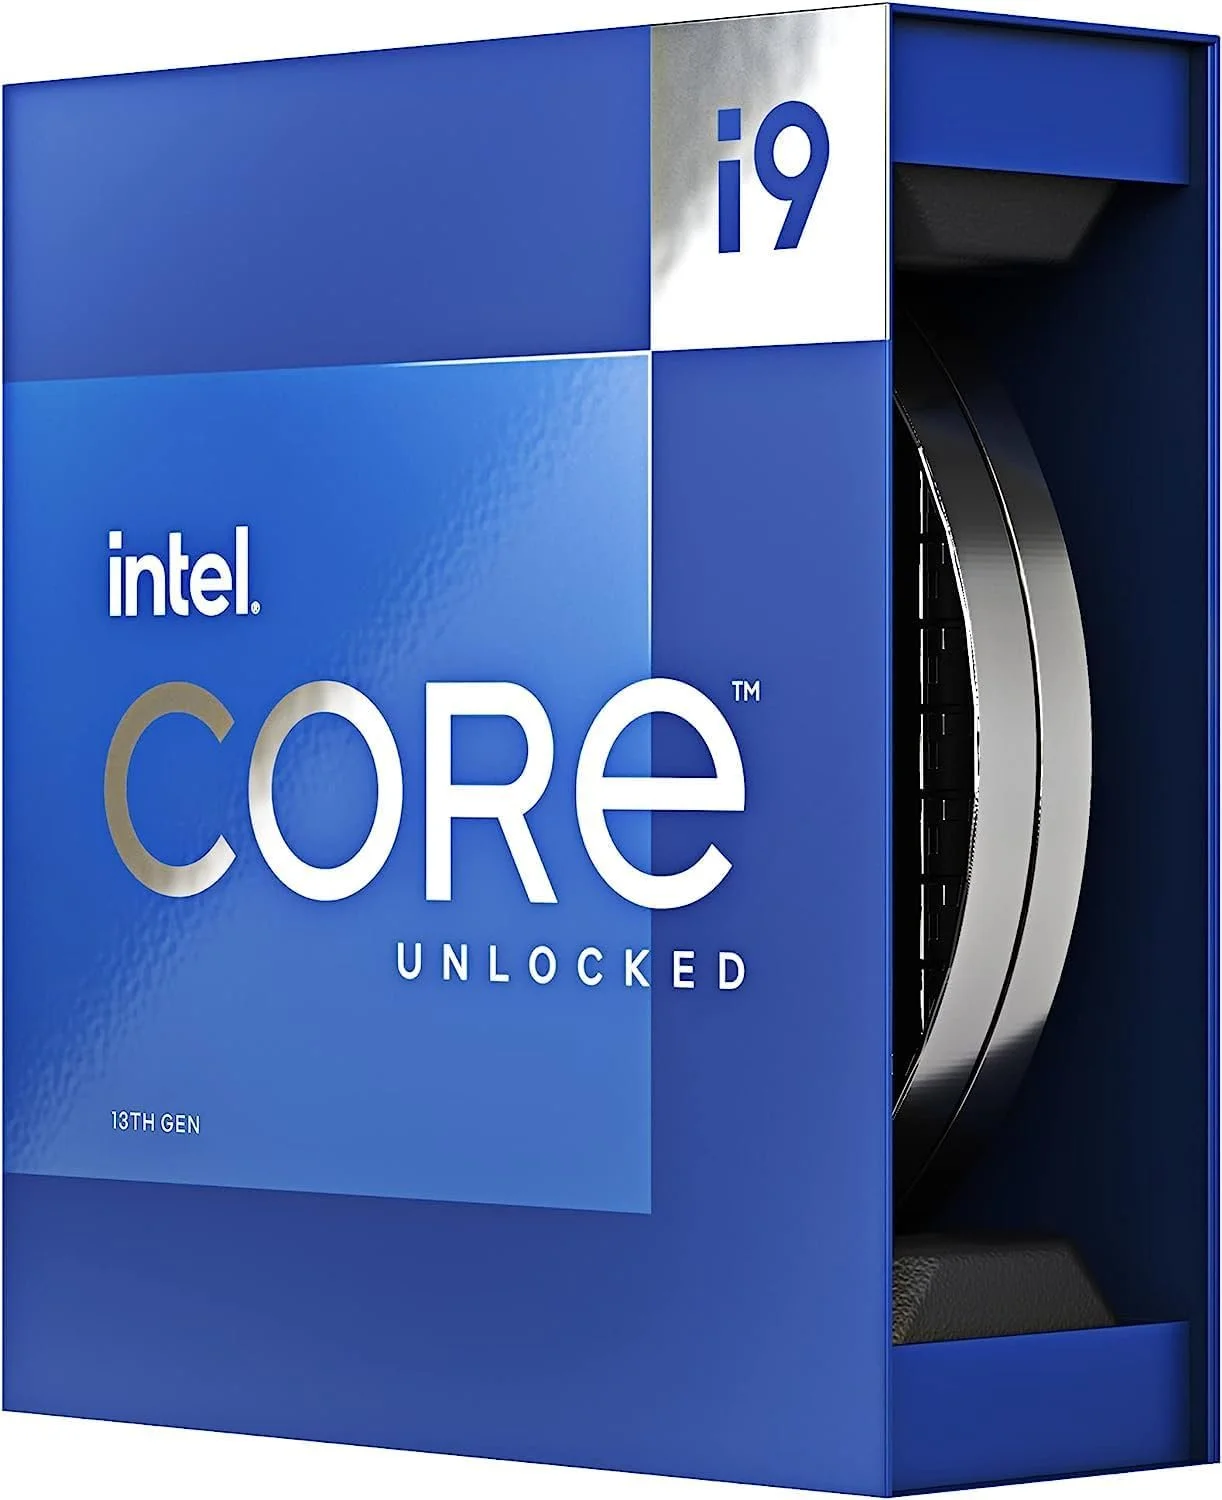
The CPU came first on the list. I was pursuing speed without compromise. I made the decision to purchase the quickest Intel i9 CPU that was available because every benchmark indicated that it was the fastest in either single-thread or multi-core tasks, especially with Adobe applications where it ruled all the benchmarks. I chose the i9-13900KS processor with 24 cores – 16 performance and 8 efficiency cores with factory overclocking to 6 GHz which adds another 10% of processing power to the standard “K” version of this processor. This processor is pure fire!


GPU
Next was graphics acceleration. Since I don't buy PCs every year, I always choose the highest-end graphic card available. Such a card would include all the latest 2D, 3D, and AI processing technologies, as well as the most CUDA cores, video RAM, and have the fastest GPU. Editing, manipulating and exporting super high-resolution panoramas, time-lapses and videos would simply fly on such a card. I chose the Asus ROG Strix GeForce RTX 4090 OC Edition 24GB GDDR6X (factory overclocked) in the white edition. It is currently the fastest graphic card in the world and is expected to remain the king of the hill until 2025.
I was on a mission to find a white Nvidia RTX 4090 graphic card. I searched everywhere, but the card was unavailable, always out of stock, or ridiculously overpriced by the opportunistic sellers. I looked for it in the UK, the USA, Germany, Spain, and the UAE. I finally found one on Amazon USA, but after waiting three weeks for it to ship, I was informed that the item was backordered and that I should cancel my order for a full refund. Other retailers also had false listings, and none of them knew when the card would be available. I was starting to doubt whether the white RTX 4090 even existed!
Then, I found a card on eBay that was reasonably priced, so I bought it. Several weeks later, the box finally arrived. But instead of the card inside, I found an empty box for a hairdryer. I had been scammed. Luckily, eBay has a Money Back Guarantee, and I got refunded.
Almost two months after I started looking for a card, I finally found one at Amazon UAE, though it cost me 15% more than the retail price. It was expensive, but at that point, I didn't care. I just wanted to get this done. If you're looking for the white Nvidia RTX 4090 graphic card, be prepared for a long and frustrating search. But don't give up! It's out there somewhere. Just be careful of scammers, and don't pay too much.


RAM
My last workstation had 128GB RAM and while it was enough for working on 4k time-lapses and editing 100-megapixel images, it struggled with 8k+ footage and panoramic images which crossed 30,000 pixels horizontal resolution. I decided to add another 64GB for a total of 192GB RAM. The frequency at which RAM operates matters too. The faster the frequency clock, faster the data can be accessed, and this leads to better overall performance. I opted for Corsair Vengeance RGB DDR5 4x48GB modules (192GB kit) running at a stable and fast 5200MT/s.


MOTHERBOARD
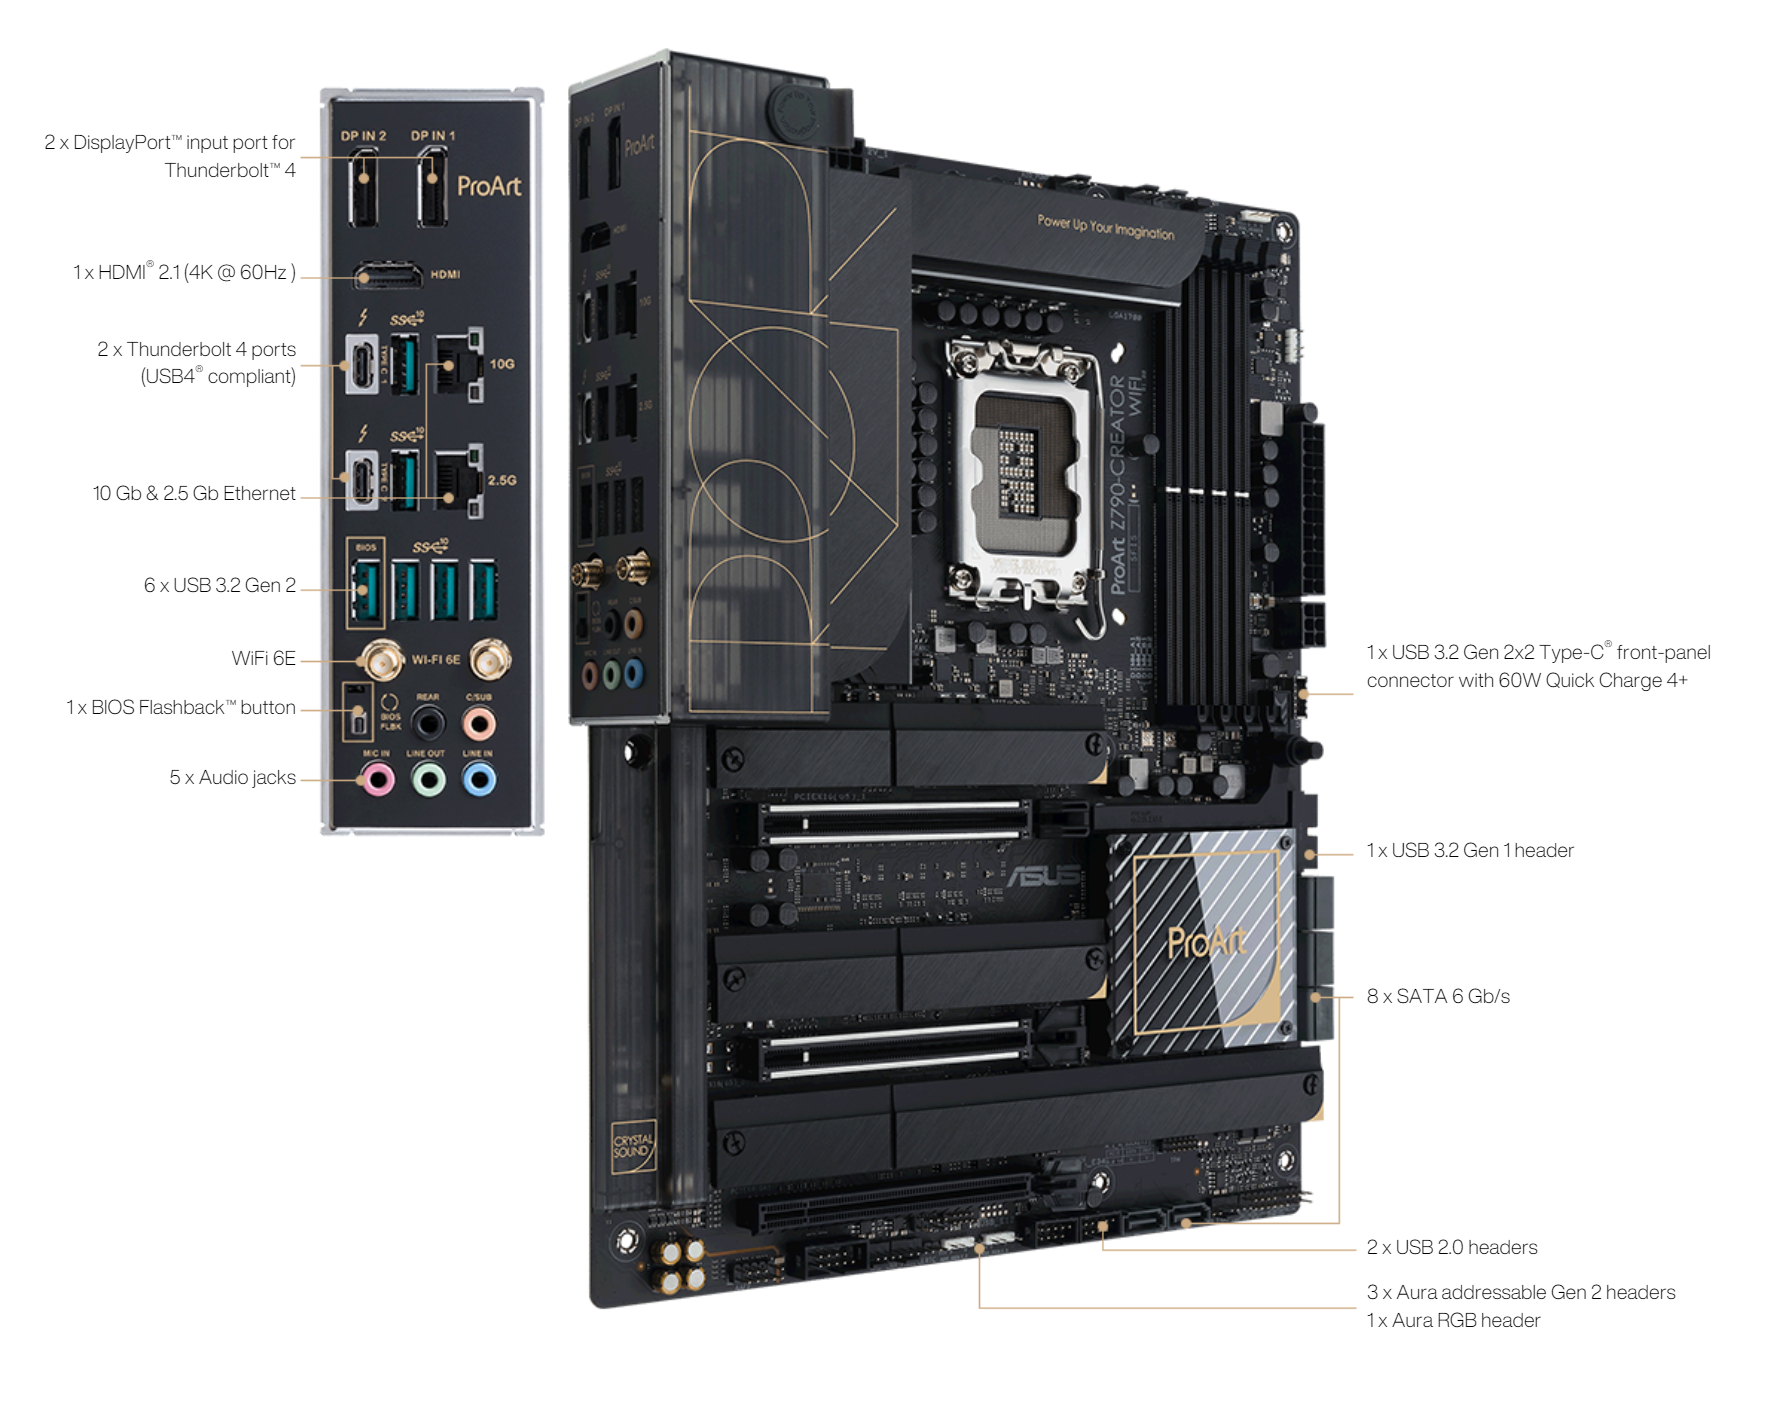
Ports! Ports! Ports! I wasn’t going to skimp on the motherboard with the top-of-the-line CPU, GPU and RAM. As a pro creator, I was looking for a motherboard that had the most NVMe SSD m.2 slots, several Thunderbolt-4 (USB4 compliant) ports, USB 3.2 and 3.0 ports, two PCI Express 5.0 and one PCI Express 4.0 slots, WiFi, DDR5 RAM support, 10Gb LAN and Bluetooth connectivity. Basically, the motherboard for creatives who plug a variety of peripherals to their computer. I chose Asus ProArt Z790-Creator WiFi motherboard which checks all the requirements, is highly rated and also looks very good.


SSD & HD STORAGE
The last and most important component of my new machine was the disk storage. As a photo and video creator, I need fast and reliable drives to handle the massive amount of high-resolution image and video files. Mechanical hard drives are not suitable for this purpose, as they are too slow and outdated. I need solid state drives, which have no moving parts and are super fast!
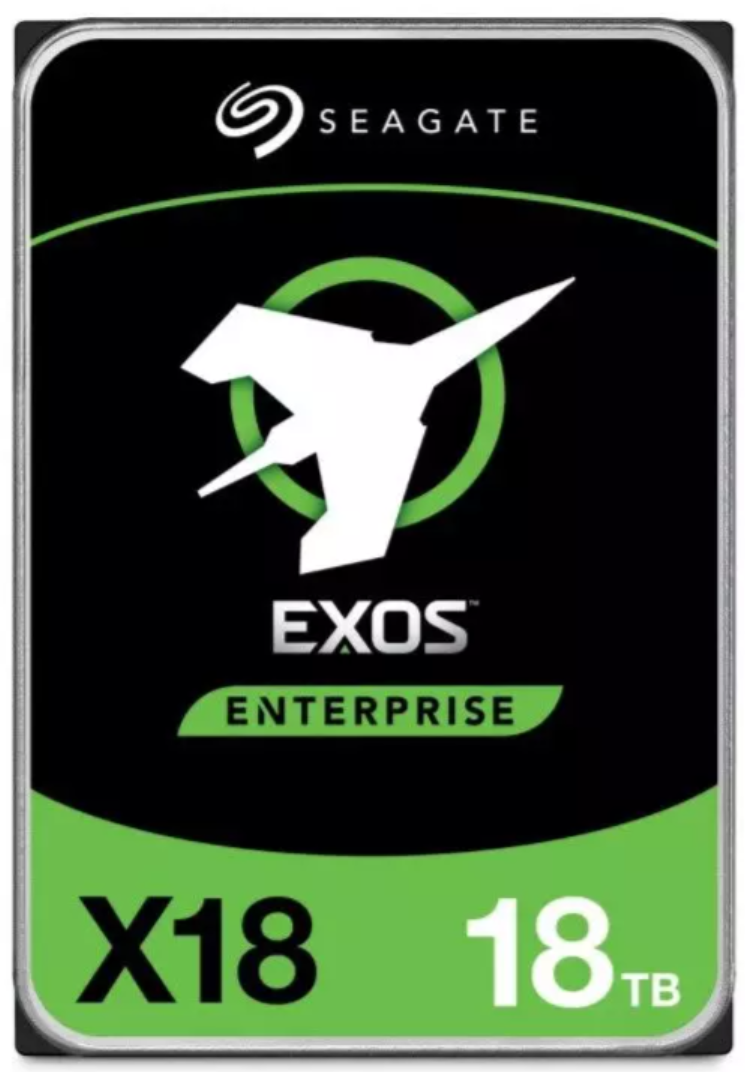
I opted for the WD_Black 4TB SN850X NVME M.2 SSDs, which are some of the fastest and most affordable solid state drives on the market. I bought four of them. I dedicated one of them for the operating system and the applications. The other three were for the media cache of Premiere, After Effects, and Photoshop, so that they could access the project assets at the highest speed without affecting the system drive. I also bought two high-capacity (18TB), enterprise-grade mechanical hard drives from Seagate, EXOS X18, for storing archived projects that did not need speed, but reliability.


THE REAL REASON FOR THIS LENGTHY BLOG: THE PHANTEKS NV7
You might think the computer case is the least important part of your system. But in reality, it plays a crucial role in protecting your components, maintaining optimal temperatures, and even adding a touch of style to your setup. Today, I want to share my experience with the Phanteks NV7, a case that completely changed my perspective on what a computer case can be.
THE INSPIRATION
I've always been fascinated by the intricate beauty of mechanical watches, particularly those with transparent cases (also known as skeleton watches). Watching the finely crafted watch parts, gears and mechanisms work together is utterly mesmerizing. This fascination led me to search for a computer case with similar transparency, allowing me to see the inner workings of my own technological marvel.
And what’s not to like about a thoroughbred Ferrari with a transparent engine cover revealing the the red and black V12 engine?


THE SEARCH
My initial search yielded hundreds of cases, many incorporating a mix of metal, plastic, and glass, often inspired by popular games. While some were visually appealing, none truly resonated with me. I realized that I wasn't interested in the exterior's aesthetics; I wanted to see what was inside.
Your PC case is not an easy choice. The more you search, the more options you will find. From sleek and simple to wild and wacky, there is a PC case for every taste and budget.


THE DISCOVERY
After extensive research, I stumbled upon the Phanteks NV7. This full tower ATX case boasted a dual compartment design, separating the motherboard, CPU, GPU, and other components from the power supply, cables, and storage devices. The clean, minimalist design with tempered glass panels instantly captured my attention.


Here's what truly impressed me about the NV7:
Minimalist design: The crystal-clear tempered glass panels with no tint offer an unobstructed view of the internal components. The absence of support columns in the corners further enhances the minimalist aesthetic.
Dual compartment design: This ingenious feature allows you to showcase the main components while neatly hiding all the cables and storage devices in the rear compartment. This results in a clean and tidy look, even with a fully assembled system.
Rear door: The rear door cleverly conceals the ports and cables, eliminating the usual messy and cluttered appearance. This design not only improves aesthetics but also simplifies cable management and dust prevention.
BUILDING A SHOWPIECE
The NV7 forced me to re-evaluate my approach to building a computer. It wasn't just about finding the right components anymore; it was about creating a visually stunning workstation and a focal point of my desk, a high-tech showcase of my technological prowess. I opted for a white NV7 to create a striking contrast against my dark office environment. This decision, while aesthetically pleasing, presented a unique challenge. Building a white computer exposed every imperfection, demanding a meticulous attention to detail and cable management. Although the assembly process was more demanding than usual, the final outcome was incredibly rewarding.
THE RATIONALE BEHIND THE MINIMALIST RGB LED LIGHTING FOR A MINIMALIST COMPUTER
I've never been a fan of flashy, colorful RGB-lit computer cases. I found the lighting inside the case to be cheesy and distracting. I couldn't see myself focusing on work while aggressive RGB lights flashed next to me like an 80s disco ball. I could have used regular, non-RGB fans to cool my computer, but there was something about the aesthetic of the Phanteks NV7 case that made me want to see it fully lit.
FINDING THE RIGHT AESTHETIC
The NV7 is the antidote to tacky design. I envisioned a transparent case with monochromatic, steady, and minimalist lighting. It reminded me of 'MU/TH/UR 6000', the sinister AI computer on board the 'Nostromo' spaceship in Ridley Scott's masterpiece sci-fi movie Alien (1979). I could also see the eternal lights of ‘HAL 9000’ computer from Stanley Kubrick's 2001: A Space Odyssey, especially the way it was portrayed during the iconic shutdown scene. Plain white, bluish or reddish tones. That's it. It made the geek in me very happy.
The lighting and the design of the fictional HAL 9000’s Logic Memory Center featured in Stanley Kubrick’s iconic ‘2001: A Space Odyssey’ and the look of the sinister room of MU/TH/UR 6000 computer featured in Ridley Scott’s ‘Alien’ movies have been on my mind ever since I’ve first seen them as a kid back in the 1980s.


FUNCTIONAL AND AESTHETIC BENEFITS
But there’s more to RGB lighting than illuminating the computer’s interiors, which highlights its components. The RGB LEDs also provide discrete lighting for my office. I find myself most creative late at night when distractions are minimal. To get into the right state of mind, I need the right music and lighting to put me in the zone. I believe that lighting plays a significant role in creating an environment that fosters creativity and productivity.
NZXT F120 RGB DUO FANS: ELEGANCE AND EFFICIENCY
Navigating the vast array of case fans available today can be a daunting task. Amidst the overwhelming choices, I was drawn to the minimalist computer fan designs of NZXT, a Californian brand known for its sleek and sophisticated computer cooling systems and cases. Their fans not only complemented my personal style but also offered the quiet performance I was seeking. With a noise rating of just 17.2dB at idle, these fans operate almost silently, akin to a gentle whisper. Additionally, NZXT's comprehensive software suite provides granular control over fan performance and RGB lighting, allowing me to personalize my computer’s cooling performance in various scenarios. After careful consideration, I opted for the NZXT F120 RGB DUO fans, a perfect embodiment of both elegance and efficiency. What I didn't know is that white fans and white computer components are always in high demand and low supply, so they are frequently sold out. It took me over a month to receive my order of fans. The Phanteks NV7 case took nearly two months to ship for the same reason. Who knew white computer components were in such high demand and hard to find!


WATER COOLING: THE ULTIMATE WAY TO KEEP YOUR CPU COOL AND QUIET
When it comes to cooling my CPU, I don’t want to settle for a noisy and bulky air-cooled fan. This computer was going to be on my desk, at my ear level. I listen to the music while I work and use the computer to edit films with sound and voiceover. I want a solution that is efficient, silent, and elegant. That’s why I chose water cooling for my CPU. Water cooling is a method that uses liquid to transfer heat from the CPU to a radiator, where it is dissipated by fans. Water cooling has several advantages over air cooling, such as:
-It can lower the CPU temperature more effectively, as water has a higher heat capacity and thermal conductivity than air.
-It can reduce the noise level, as the fans can run at lower speeds and the liquid does not produce any sound.
-It can free up more space inside the case, as the water block that attaches to the CPU is much smaller than a large heatsink.
-It can enhance the aesthetics of the PC, as the water block, tubing, and radiator can have various colors, shapes, and lighting effects.
For my CPU water cooling system, I picked the NZXT Kraken Z73 RGB in white color. This is a premium all-in-one liquid cooler that has three 120mm RGB fans and a cooler with an LCD display. The LCD display can show various information, such as the CPU temperature, the fan speed, or even a custom image or GIF. The cooler also has a sleek and minimalist design that matches my PC perfectly. You can see how it looks in the photos below.


POWER SUPPLY
I wanted to make sure that my future PC would have enough power to run all its components smoothly and reliably. I calculated that the total power consumption of my PC would be 1020W, based on the specifications of each component. However, this is not the optimal power supply for my PC, as it is recommended to have a 20% margin of safety to avoid any issues or failures. Therefore, I needed a power supply unit (PSU) that could provide at least 1230W of power. But I also had another factor to consider; I planned to upgrade some of my components next year, which would increase the power demand even more. So, I decided to go for a 1600W PSU, which would give me plenty of headroom and flexibility for my current and future needs. I chose the Asus ROG THOR 1600W Titanium PSU, which is one of the best PSUs on the market. It has a titanium efficiency rating, which means it can deliver up to 94% of its power output with minimal waste and heat. It also has a stunning design, with a customizable OLED display, RGB lighting, and sleeved cables. It is a perfect match for my PC, both in terms of performance and aesthetics.


NVMe RAID STORAGE SOLUTION
In the demanding world of time-lapse filmmaking and architectural photography, I constantly grapple with massive amounts of data. Processing these large files can be an arduous and time-consuming task, especially when dealing with ultra-high-resolution cameras like the Fujifilm GFX 100 II, which produces 100-megapixel images. Waiting on my computer to process these files can significantly impact my productivity and ability to meet client deadlines.
To tackle this challenge, I turned to RAID storage, a technology that combines multiple storage devices into a single logical unit. This approach offers several advantages, including increased storage capacity, improved data redundancy, and faster data transfer rates.
After careful consideration of my specific needs, I determined that NVMe RAID storage was the ideal choice for my workflow. NVMe drives, also known as Non-Volatile Memory Express drives, are solid-state drives that connect to the computer via the PCIe bus. This connection allows them to transfer data at exceptional speeds, reaching up to 28 GB/s. This remarkable performance boost translates into faster file transfer rates, reduced processing times and realtime scrubbing of multiple 8k video files in Adobe Premiere, for example.
The benefits of NVMe RAID storage extend beyond its exceptional speed. RAID arrays provide massively extended storage volumes and data redundancy, ensuring that even if one drive fails, the system can continue to operate without losing data. This protection against data loss is crucial for safeguarding my valuable work.
Implementing NVMe RAID storage has transformed my workflow, empowering me to process large volumes of files quickly and efficiently. The combination of fast data transfer rates, increased storage capacity, and data redundancy has made NVMe RAID storage an indispensable tool for my photography business.
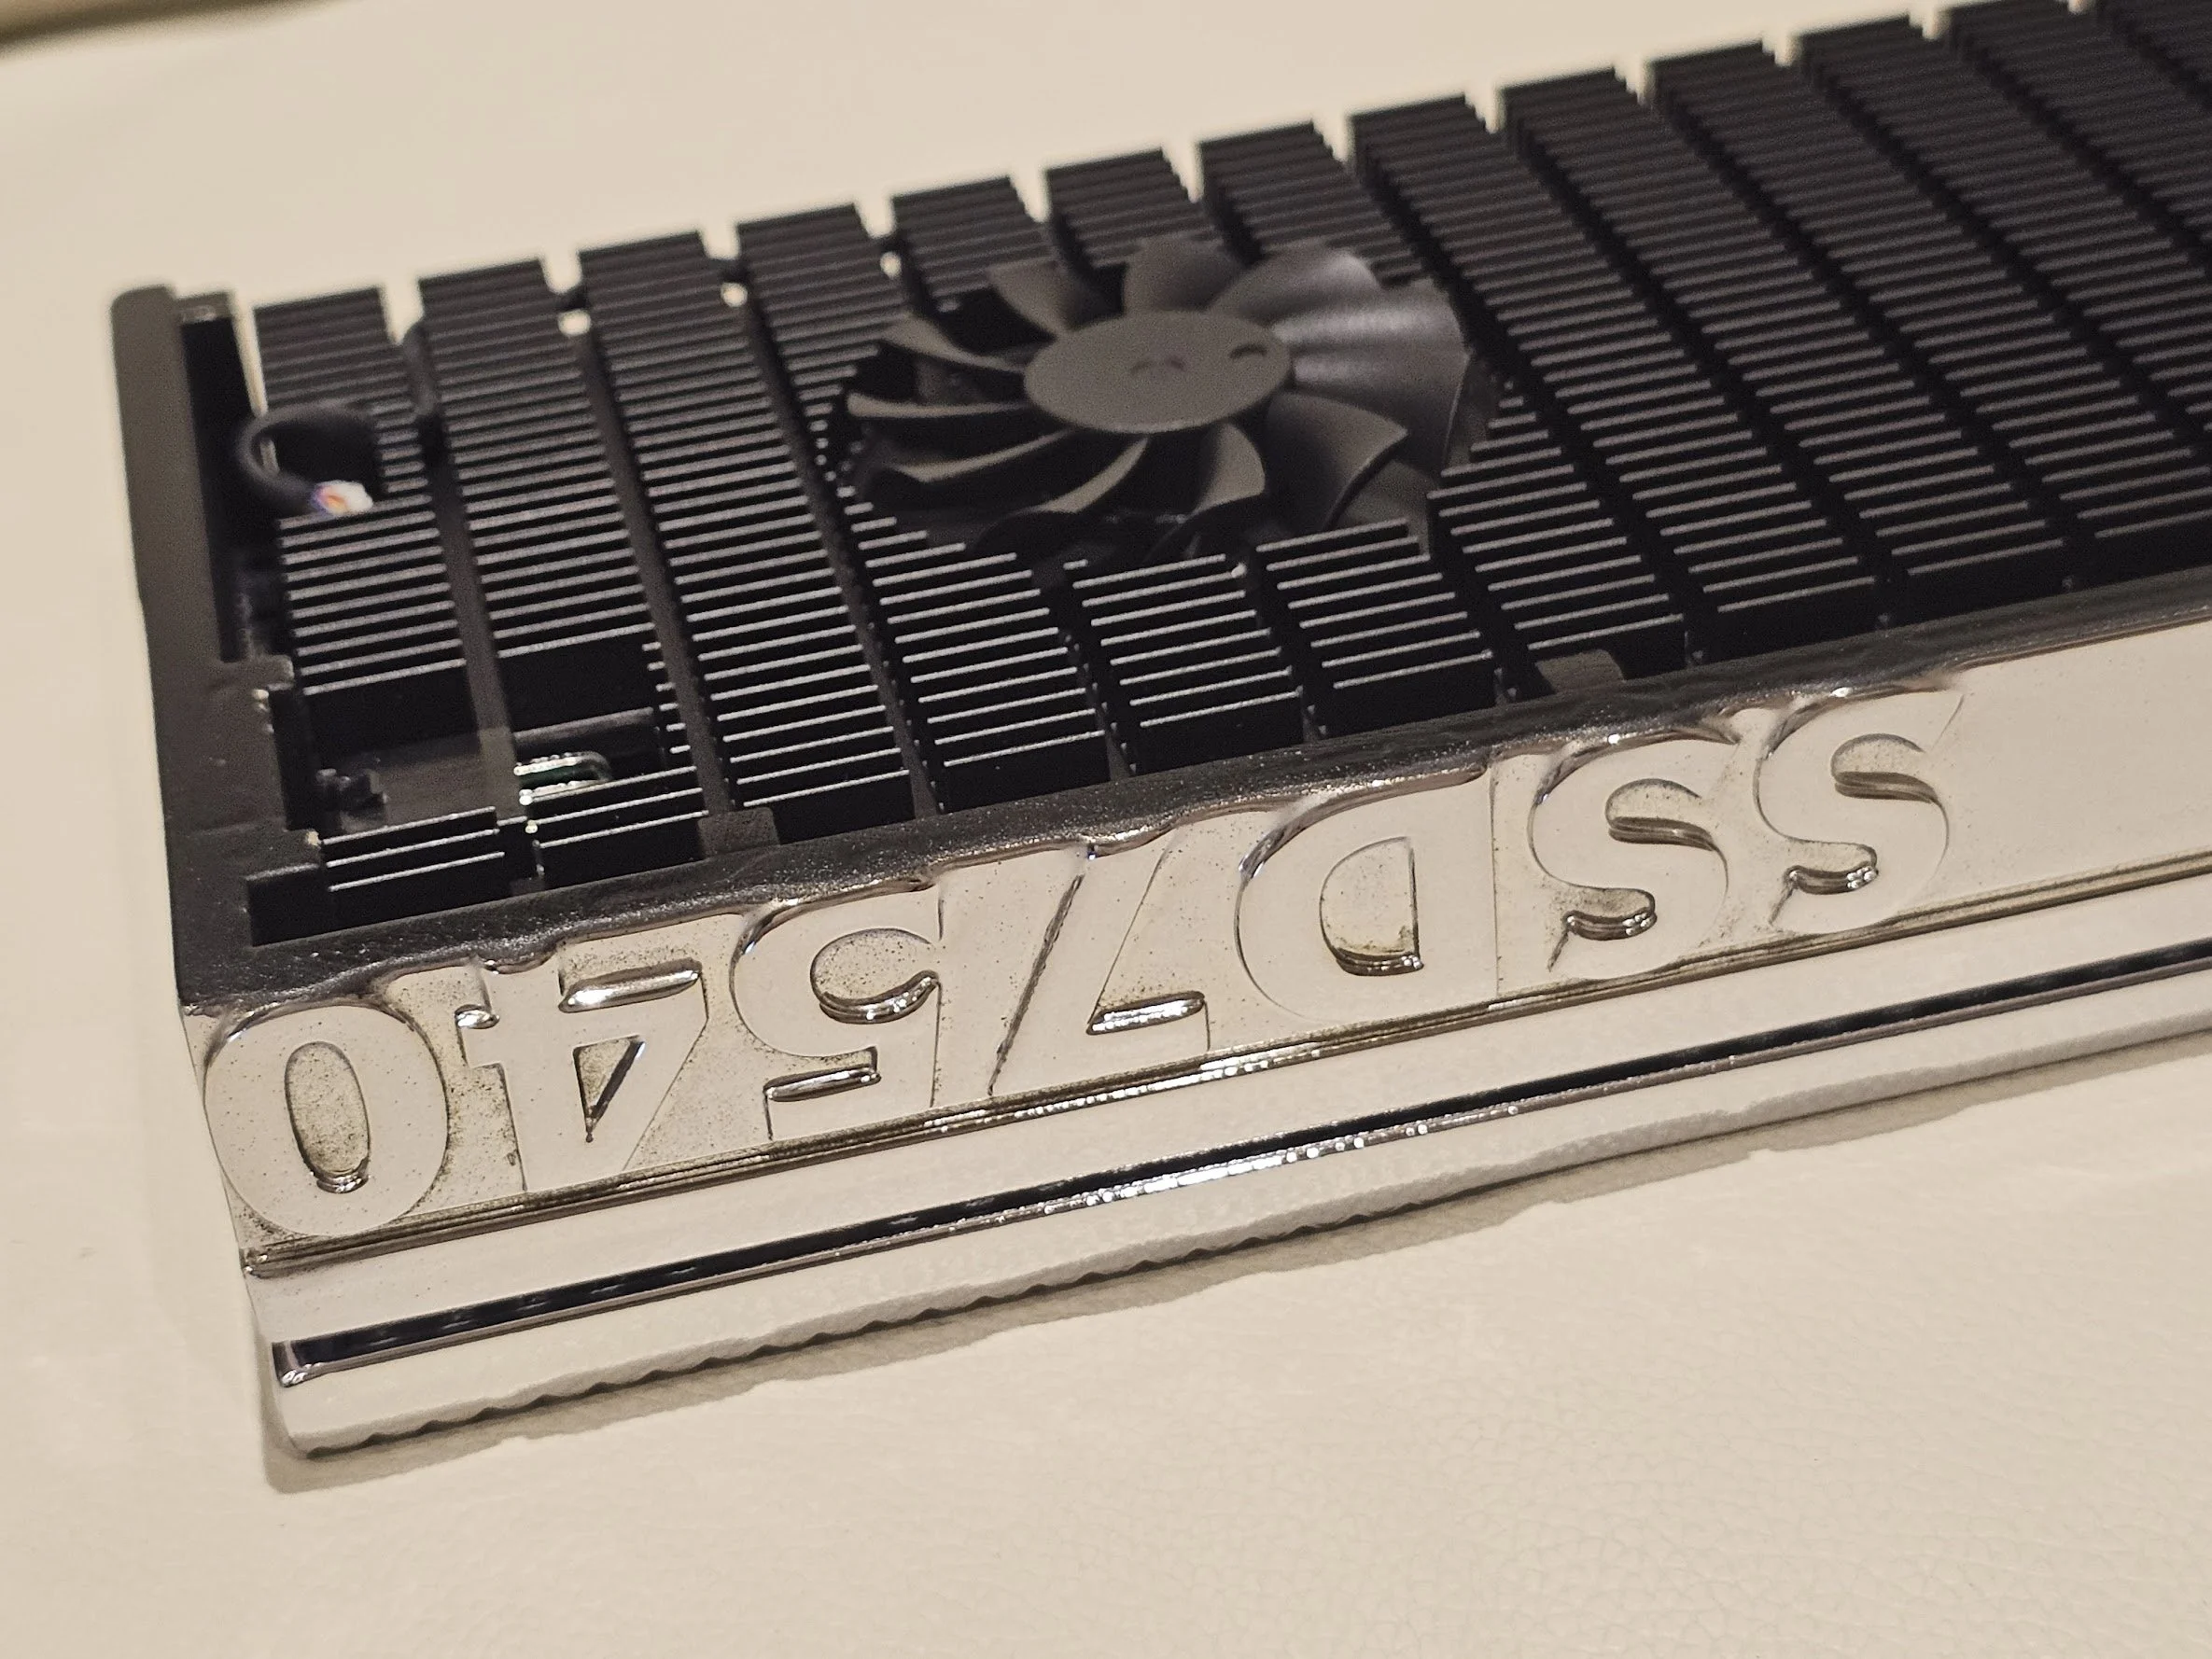
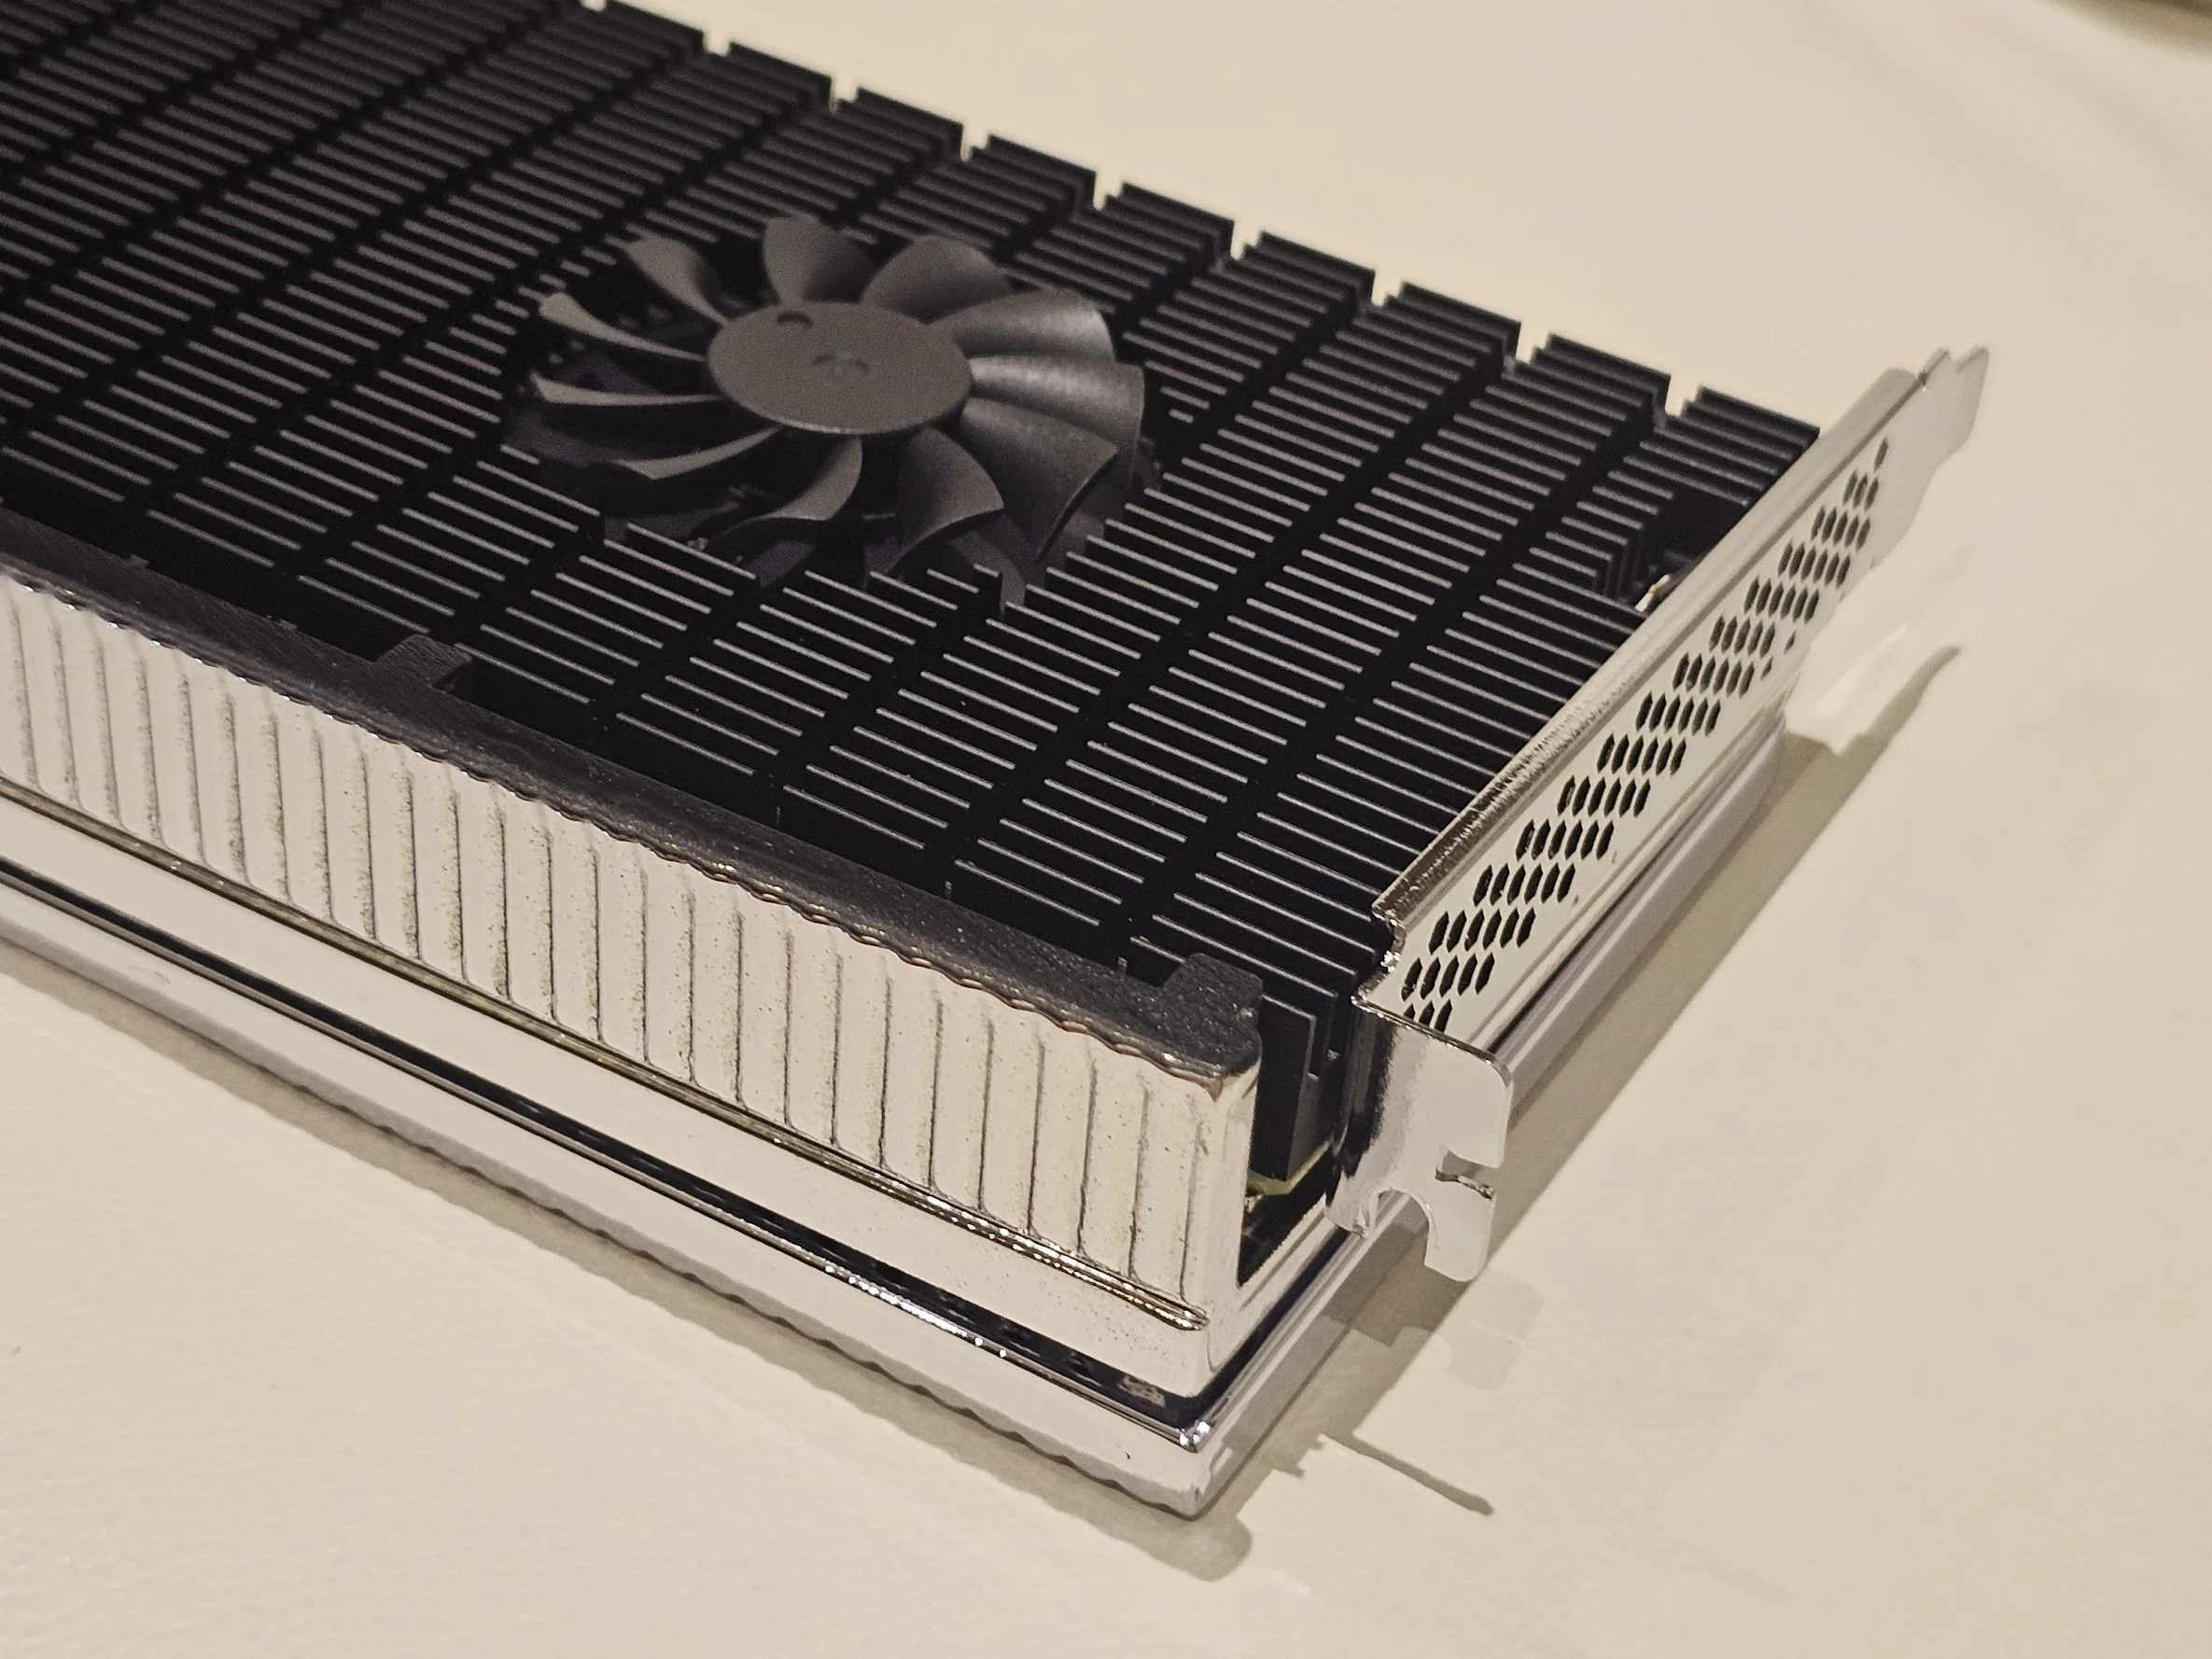
After extensive research, I selected the HighPoint SSD7540, an 8-port M.2 NVMe RAID card capable of delivering transfer speeds of up to 28 Gigabytes per second (GB/s). It’s a PCIe card, which means it communicates directly to the CPU, bypassing the bottleneck of data interfaces such as USB, SATA and Thunderbolt. The CPU communicates directly with the NVMe drives via the PCIe bus, maximizing data transfer speeds.
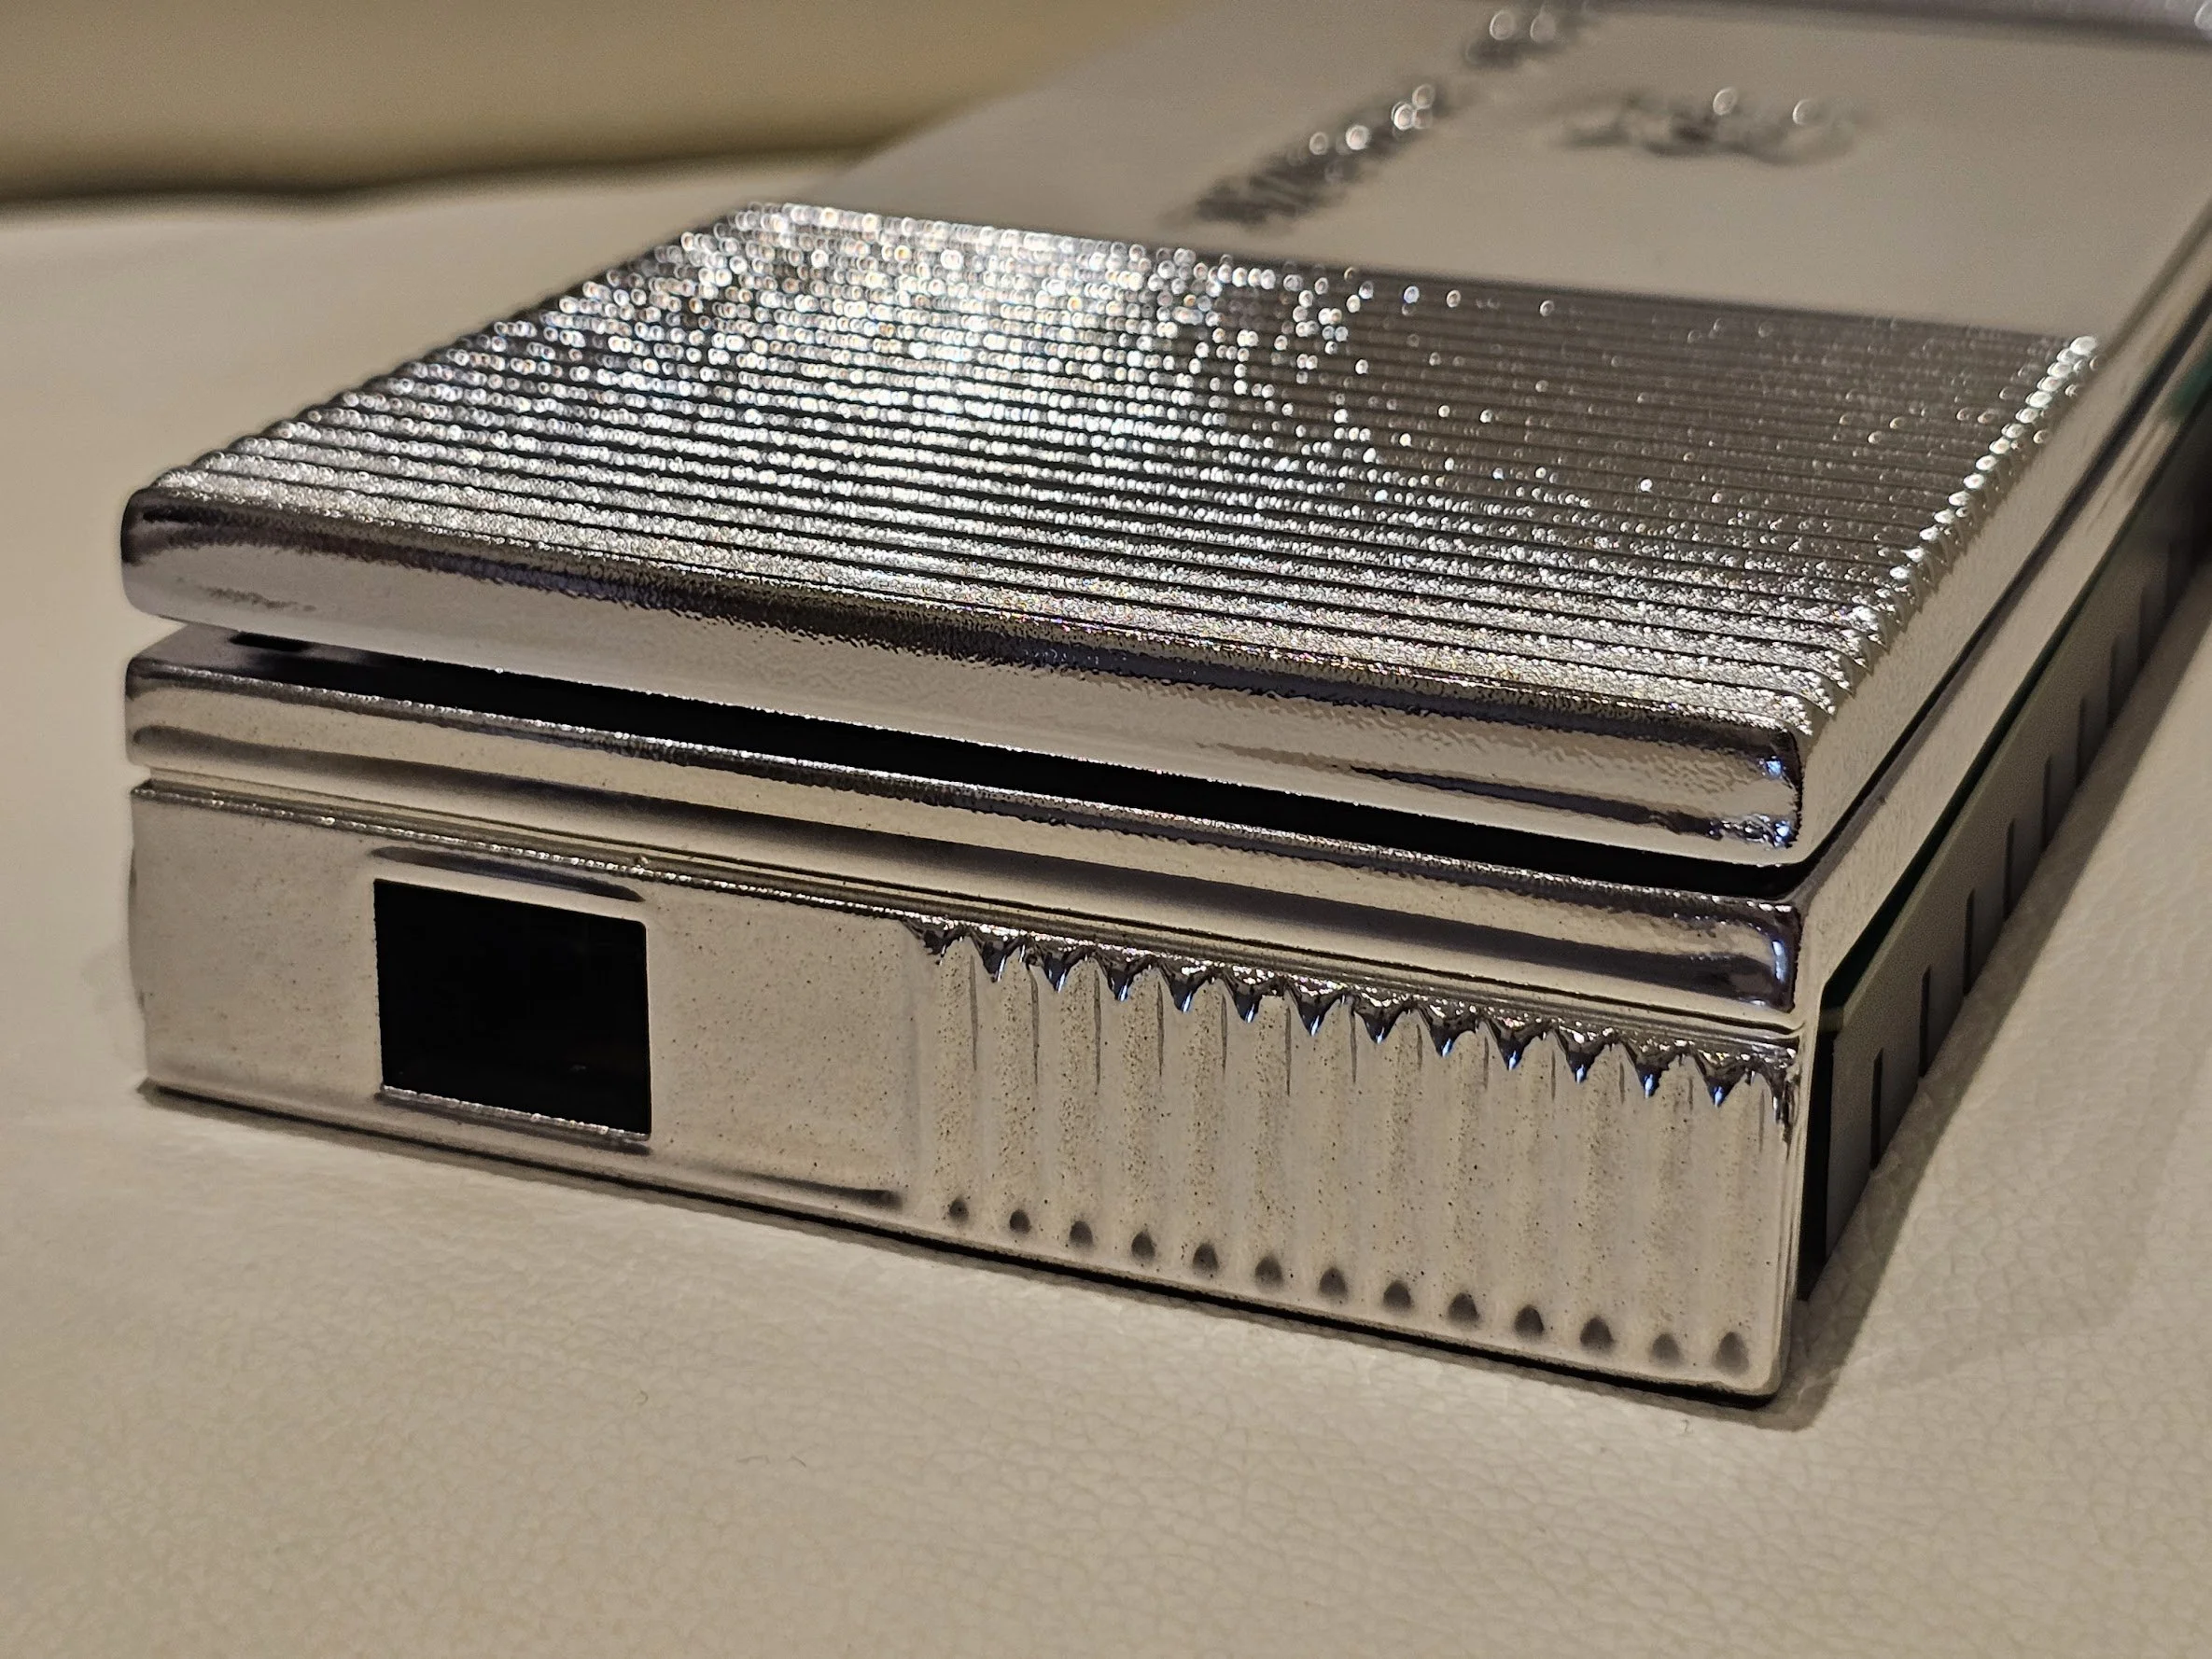
the need for a custom case for highpoint ssd7540
While the HighPoint SSD7540 delivered exceptional performance, its barebones industrial design clashed with the sleek aesthetic of my computer. The bare green PCB and large black heatsink looked out of place, prompting me to design a custom case that would seamlessly integrate with my computer's overall design.


DESIGN AND FABRICATION CHALLENGES
My initial design called for a CNC-machined aluminum case, but the intricate details and high cost of production made this option impractical. Acrylic housing was also considered but ultimately dropped as there was no feasible way to craft all the what I had mind.
3D printing emerged as the most viable and only solution, offering the flexibility and precision I needed. I envisioned a futuristic housing with a mirror finish that would reflect the computer’s interior components and its lighting. I designed straight surfaces with thin, angled ridges on the top and sides which acted as multi-directional mirrors, reflecting all its surroundings. This surface treatment was inspired by the fancy DuPont lighters that my late uncle used to flaunt in the 1980s. They were pricey, but well-crafted lighters that I admired as a kid, even though I never smoked cigarettes. It’s interesting how and where we find our inspiration sometimes.
The first 3D print failed because the resin walls were too thin, causing the case to bend during the printing process. I needed to improve the 3D model. Luckily, my good old friend Massimo Ruggeri is a 3D modeling expert, and he quickly made the necessary changes with AutoCAD and 3D Studio MAX. The mechanically improved 3D model was sent to the 3D printing company, and they produced a perfect case prototype.
Let me show you the images of the whole process, from design to execution. In the top row, you can see the 2D CAD drawings of the case created with AutoCAD. Next, you can see the rendered 3D CG model that Massimo Ruggeri made with 3D Studio MAX. Finally, you can see the Stereolitogrpahy (SLA) 3D printed case in its original color before the chroming process.


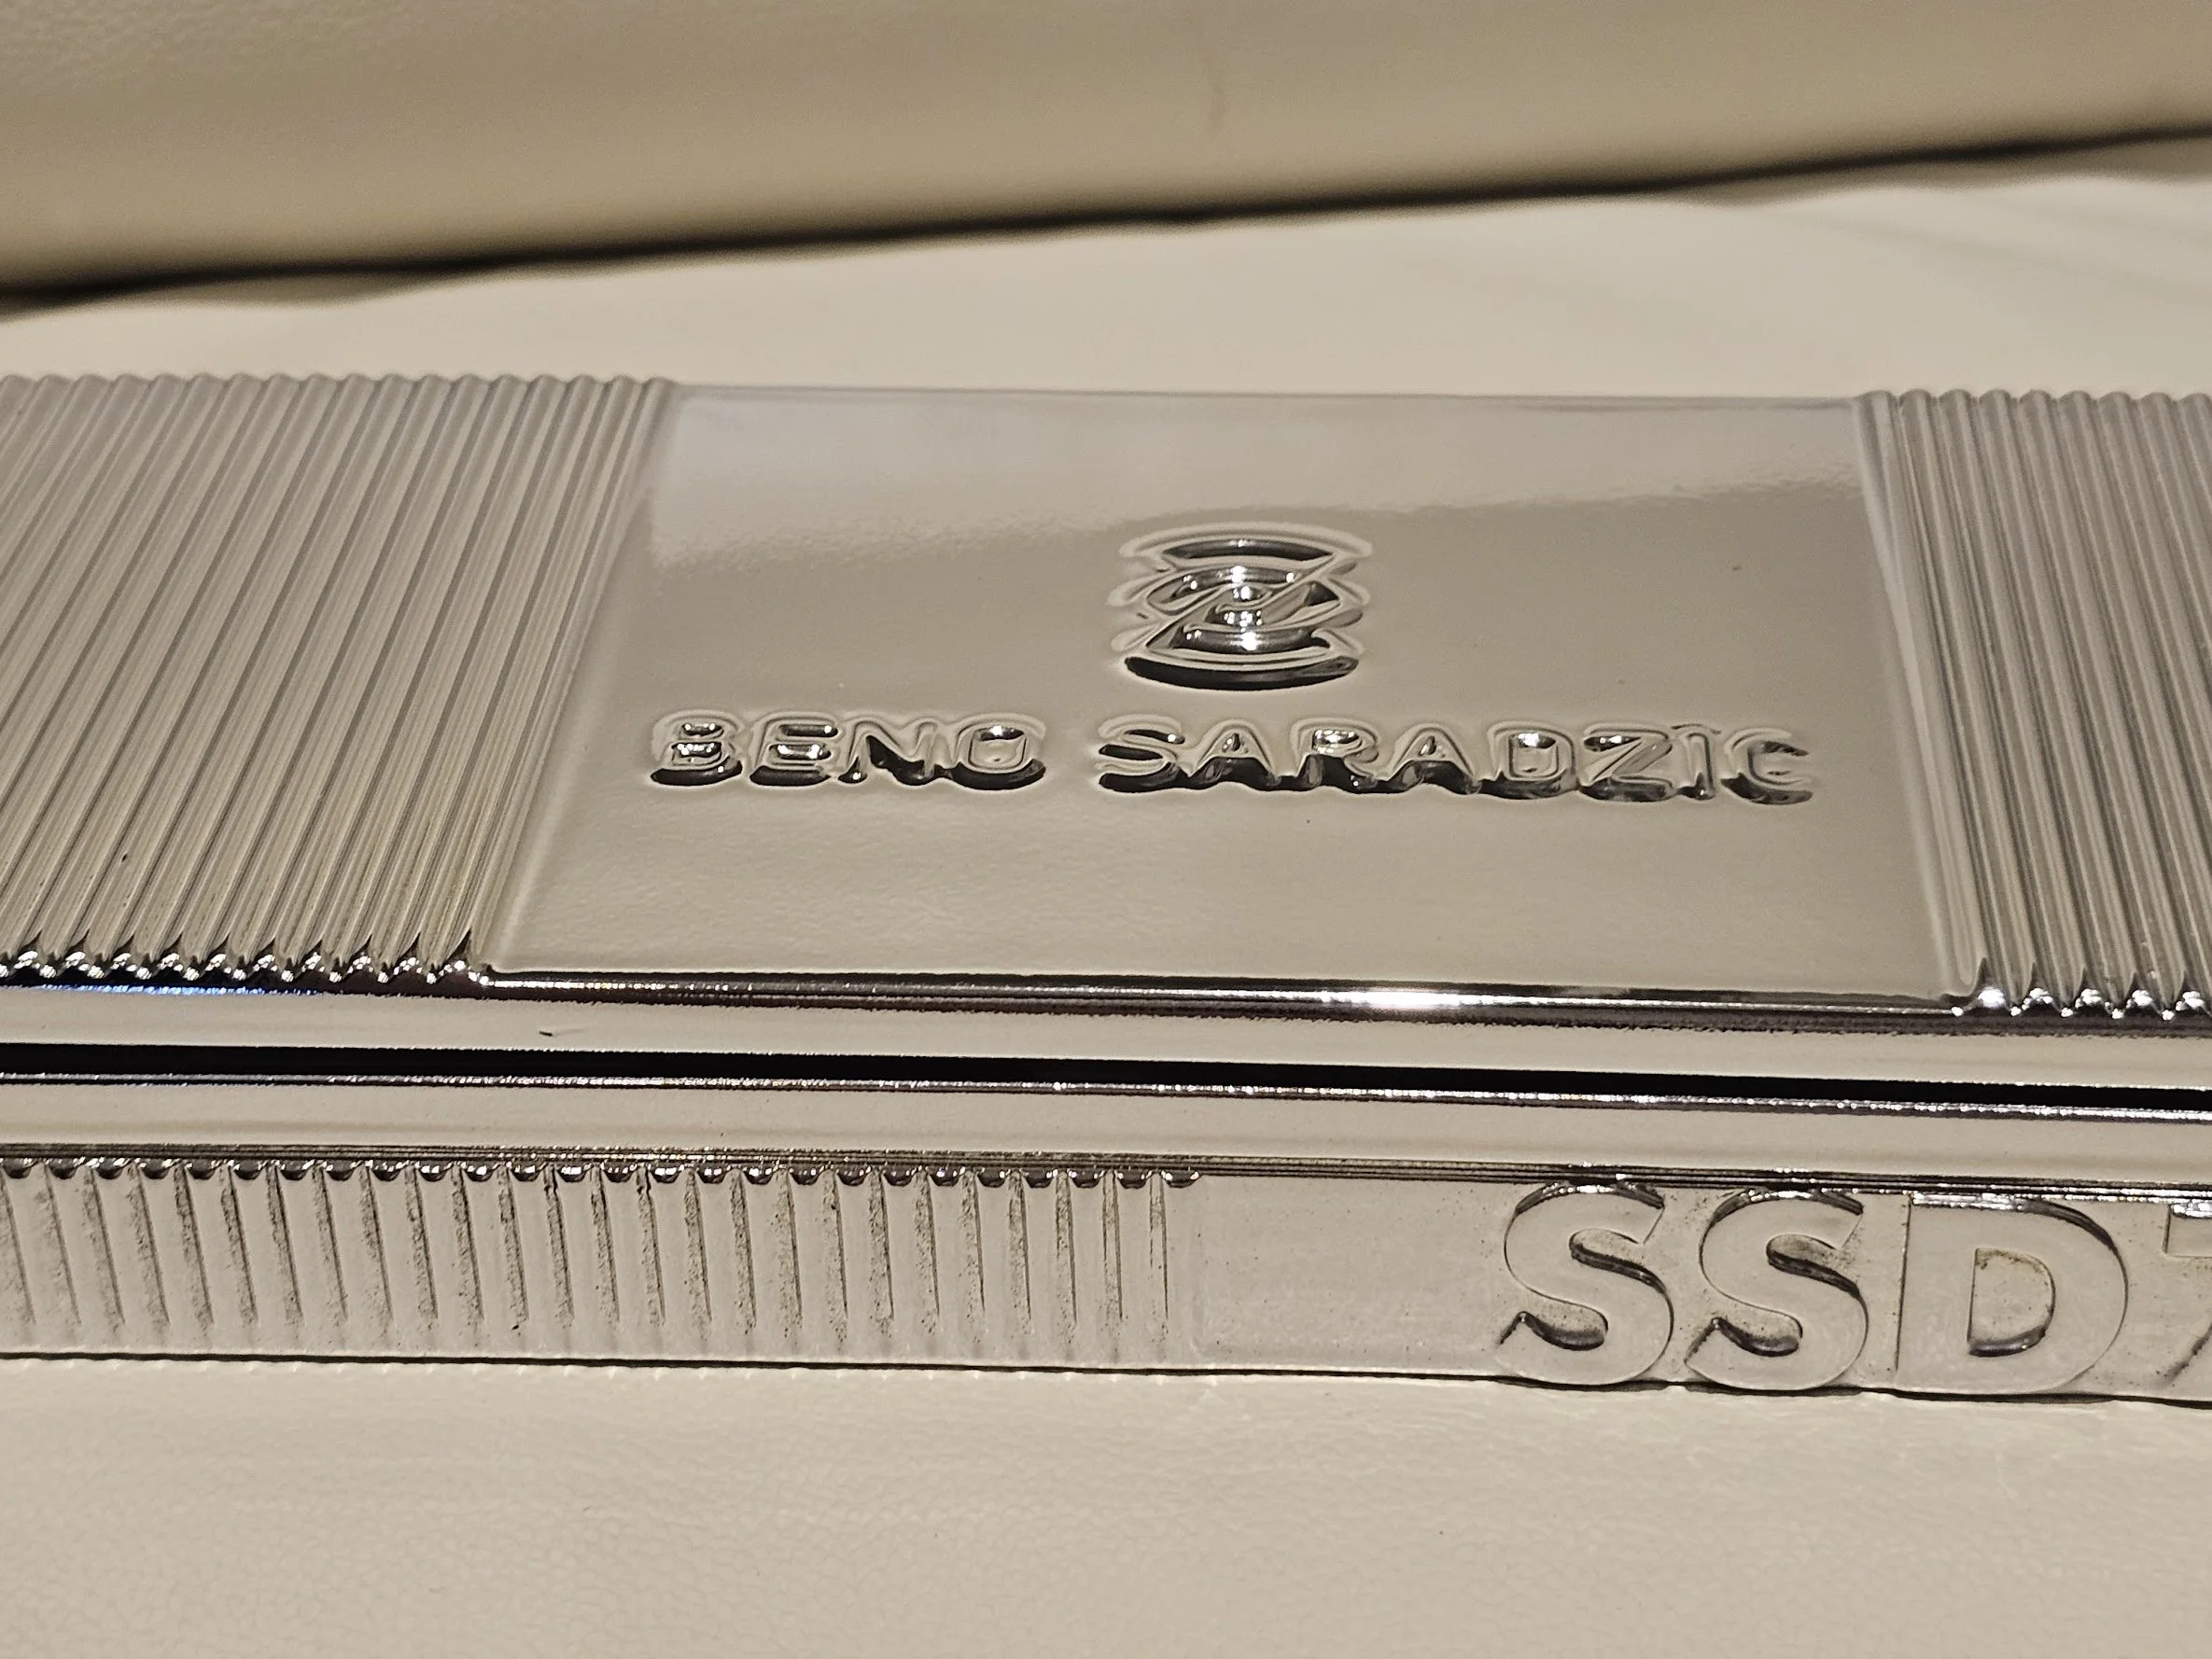
The final challenge was mirror chrome finish. The resin used for 3D printing was not electroconductive, so conventional chrome plating was impossible without a special base coating. But that would have damaged the fragile resin, so we scrapped that idea. Fortunately, a new chrome plating process had recently become available (isn’t technology amazing?), which involved spraying paint with metallic particles onto the surface material in a special multi-stage process. This resulted in a finish with 98% light reflectivity of conventional electro-chrome plating. The outcome, which took almost two months of design, experimentation, failed attempts and manufacture, was stunning, and it looked amazing inside my computer. I was thrilled.
Here’s the fully finished case, assembled with the HighPoint SSD7540 NVMe RAID card. Everything fit together perfectly like a glove. It was a very rewarding sight after all that work!


PERIPHERALS
BLU-RAY DISC READER & WRITER: Preserving the Digital Legacy with an M-DISC-Capable Blu-ray Drive
In my personal archive, I still possess hundreds of CD-ROMs and Blu-ray discs, each containing a treasure trove of my past projects and digital libraries meticulously compiled over the past three decades. These discs serve as a tangible reminder of my creative endeavors and the ever-evolving landscape of technology. While access to these archived materials is infrequent, the need to revisit them occasionally arises. However, my primary motivation for seeking a new drive extends beyond mere access. I am particularly drawn to the ability to burn M-DISCs, an archival-grade optical disc technology renowned for its exceptional longevity. M-DISCs, capable of preserving data for over 1,000 years, offer a compelling solution to the pressing issue of digital data preservation.
The importance of data preservation cannot be overstated. In just the past two decades, humanity has witnessed an exponential growth in the creation and storage of digital information. Our collective knowledge, our shared history, and the very essence of our civilization are increasingly intertwined with the digital realm. Yet, the fragility of digital media poses a significant threat to this invaluable heritage. Conventional optical discs, such as CDs and DVDs, are susceptible to degradation over time, rendering them unreliable for long-term data storage. M-DISCs, on the other hand, address this critical concern by employing an inorganic recording layer that resists environmental factors and physical wear and tear.
My choice of the OWC Mercury Pro External USB 3.0 Blu-ray Reader and Writer reflects my commitment to data preservation. This high-performance drive boasts impressive read and write speeds, supporting a wide range of optical disc formats, including M-DISCs. Its sleek, full-metal housing exudes an air of refinement and durability, befitting its role as a guardian of digital memories.
I’m looking forward to archiving and preserving my digital legacy, and eager to share my insights and experiences. The topic of data preservation deserves greater attention, and I hope to contribute to a broader understanding of its significance and the role of M-DISCs in safeguarding our collective digital heritage.
OWC Mercury Pro 16x Blu-ray, 16x DVD, 48x CD Read/Write Solution, ability to read and write Blu-ray discs up to 128GB.


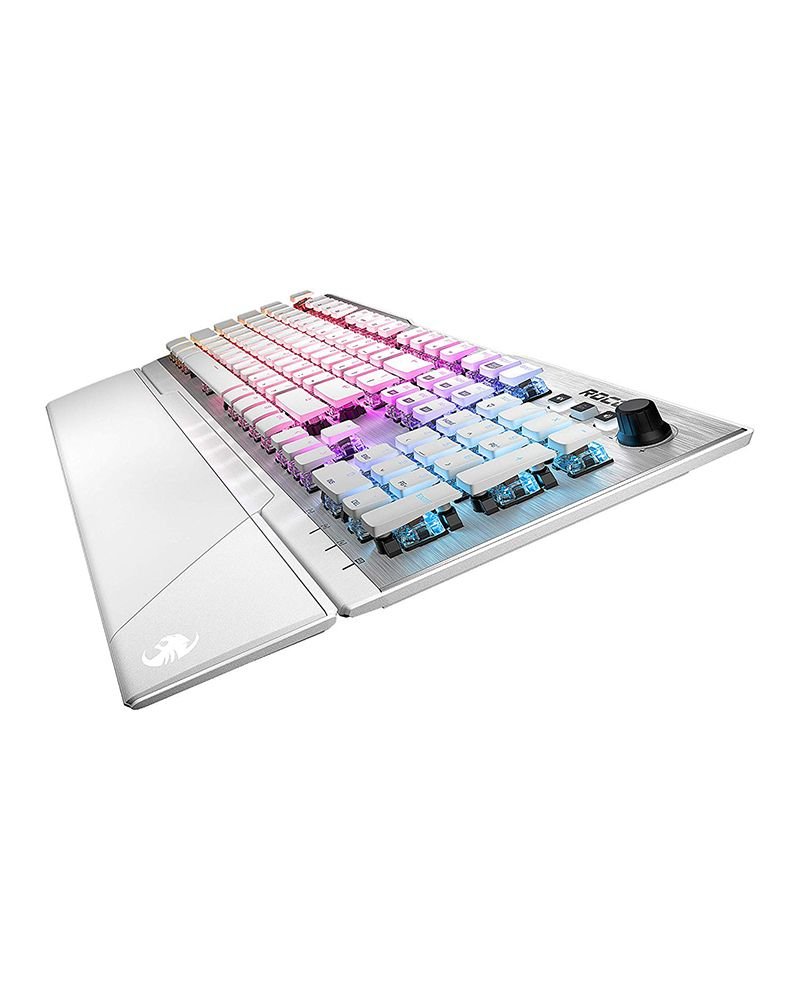
KEYBOARD
As a fast and proficient typist, I have always been very picky about my computer keyboards. I can blind-type 120 words per minute, so I need the keys to feel just right. Not too loud, not too quiet, but with satisfying tactile feedback. I prefer keys with medium travel distance and that is why I prefer keyboards with magneto-optical switches, which are more durable (1+ million keystroke lifespan) and responsive than mechanical or membrane switches. I also need backlit keys, as I often work in dimly lit editing room. And of course, I need a full-sized keyboard with a numeric keypad and all the essential keys for editing commands.
Finding the perfect keyboard for my needs was not easy, but I finally discovered the ROCCAT Vulcan 122 AIMO, a German-made keyboard that combines high quality and smart design. This keyboard has everything I want and more. It has Titan switches, which are magneto-optical switches that offer a smooth and precise keystroke. It has Ultra-low-profile keys, which reveal the inner structure of the keys and create a unique and elegant look. And it has AIMO RGB lighting, which is a dynamic and customizable lighting system that adapts to your usage and creates a stunning visual effect.
The ROCCAT Vulcan 122 AIMO is not only a great keyboard for typing, editing photos and videos, but also for gaming, as it has a fast and accurate performance, anti-ghosting technology, and a detachable palm rest. It is also easy to set up and customize, as it comes with dedicated software that allows you to adjust the lighting, the macros, the profiles, and more. I have been using this keyboard for a while now, and I absolutely love it. If you’re someone who appreciates quality, great engineering and aesthetics, look no further. This keyboard is truly great.


THUNDERBOLT-4 DOCK
As a professional architectural, aerial and time-lapse photographer, I need a computer that can handle multiple devices and connections. I often use external hard drives, camera memory cards, monitors, and other peripherals for my projects. That’s why I chose the Asus ProArt Z790 motherboard, which has a lot of ports and features for creative professionals. However, there is one problem: all the ports are at the back of the workstation, which is not very convenient or accessible. I don’t want to waste time and energy reaching behind the computer and looking for the right port every time I need to plug or unplug something. I need a solution that brings all the ports to my fingertips.
That’s where the Caldigit TS4 Thunderbolt Dock comes in. This is not your average dock. It’s a powerhouse of a dock that uses the latest USB-4.0 / Thunderbolt 4 interface, which allows blazing-fast speeds of up to 40Gbps in both directions. This means I can transfer data, display video, and charge devices with one cable and no compromise. The Caldigit TS4 Thunderbolt Dock offers a whopping 18 ports of connectivity, including 5 USB-A ports, 3 USB-C ports, one SD and one MicroSD 4.0 UHS-II card reader, one DisplayPort 1.4 port, and 2.5 Gigabit Ethernet port. It also supports up to one 8K or two 6K external monitors, and can deliver 98W of sustained power to charge my laptop or portable battery pack. It is a sleek and sturdy device that fits perfectly on my desk and matches my workstation.
The Caldigit TS4 Thunderbolt Dock is not a cheap dock, but it is worth every penny. It’s very well made and it makes you more productive.


GRAPHIC TABLET
I have always used a graphic tablet, a pressure-sensitive stylus, and an absolute positioning puck (like mouse, but much better…). These are the best input devices for our profession. Graphic tablets enable accurate and natural interaction with image or video editing software, which is impossible with a regular mouse or worse, a trackpad/touchpad. The stylus allows you to draw with varying thickness and opacity, depending on how hard you press. The tablet has a larger and smoother surface than a mouse pad, which makes it easier to draw smooth curves, lines and reduces wrist strain or fatigue. The tablet also has multiple buttons that you can customize with your favorite and most used commands for quick access to different tools. You can also use the stylus to sign documents with your own handwriting. There are too many benefits to list. I picked Wacom Intuos5 Pro. This was a no-brainer, as Wacom is the undisputed leader in this field for the past 3 decades or so. It is the ultimate standard of graphic tablet and pressure-sensitive styluses.


CONCLUSION
Building this computer was an amazing and educational experience. I was able to craft a machine that not only meets my technical needs, but also reflects my personal style and taste. By choosing, and even crafting each component carefully, I created a computer that is optimized for photo and video editing, customized to my preferences, and stunning to look at. It has become the centerpiece of my office environment.
I am thrilled with the outcome, and I hope that this blog post has encouraged you to pursue your own dream computer project. A computer that not only serves your purpose, but also sparks your creativity and passion. Below is the gallery of the fully finished computer in its new home, my office. Enjoy!


You’re welcome to leave the comment or any questions you may have for me. Always happy to hear from you all!